Before You Begin: A Quick Checklist
Define Your Goal
Know what you want to achieve with this campaign (e.g., send transaction alerts, promote an offer, re-engage users).
Prepare Your Audience
Know which contacts you want to reach. Have a Contact List or Segment ready for targeting.
Select a Template
All WhatsApp campaigns must use a pre-approved Message Template. Ensure the template you want to use has been approved by Meta.
Building Your WhatsApp Campaign
After navigating to the Campaigns > WhatsApp page and clicking ”+ New campaign”, you will be guided through the following setup wizard.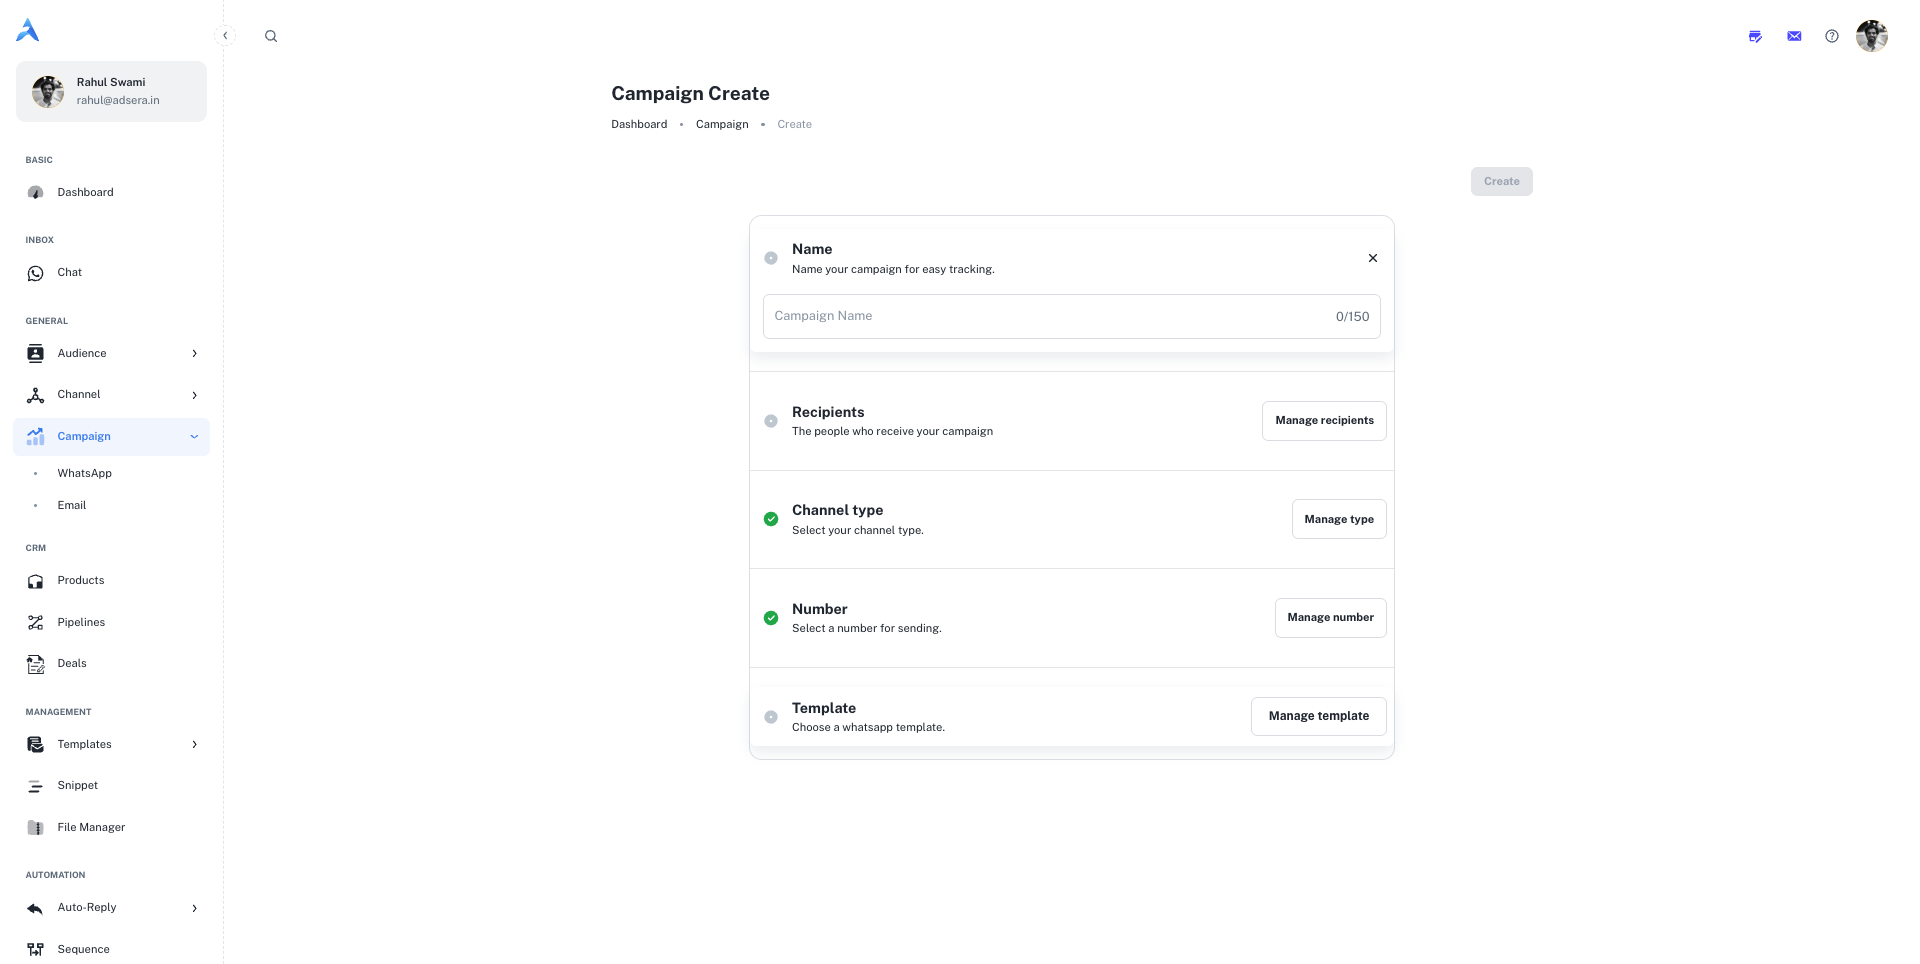
1. Name Your Campaign
This is an internal name for easy identification within AdsEra (e.g., “Post-Purchase Follow-Up,” “Diwali Sale Offer”). It is not visible to recipients. The name can be up to 150 characters.
2. Define Your Recipients
This is where you select who will receive your campaign. AdsEra offers powerful segmentation options:
- Select Lists: Choose one or more of your static contact lists.
- Select Segments: Target dynamic, rule-based segments of your contacts.
- Filter Recipients (Advanced): Build a custom, one-time filter for this specific campaign using various contact attributes and
AND/ORlogic.
3. Select Your Channel (WABA)
Choose the specific WhatsApp Business Account (WABA) number you want to send this campaign from. This is especially important if you manage multiple numbers for different brands or departments.
4. Choose Your Message Template
All WhatsApp campaigns must use a Message Template that has been pre-approved by Meta.
- Click “Manage template” to open a gallery of your approved templates.
- Browse or search for the template you wish to use.
- If the template includes variables (e.g.,
{{name}}), you will be prompted to provide values for them in a subsequent step to personalize the message for each recipient.
5. Schedule Your Campaign
Decide when your campaign will be sent.
- Send Immediately: To send the campaign as soon as you finish the setup.
- Schedule for Later: Pick a specific future date and time for delivery.
Important Considerations
Understanding Message Templates
Understanding Message Templates
WhatsApp requires that all business-initiated conversations use pre-approved Message Templates to prevent spam and ensure a high-quality user experience. These templates can include text, rich media (images/videos), and interactive buttons.
Personalization with Variables
Personalization with Variables
Using variables like
{{FIRSTNAME}} or {{order_id}} in your templates is key to creating personalized and engaging messages. When you select a template with variables, AdsEra will guide you through mapping these to the corresponding contact attributes.