 The page is divided into two main sections: the Contact Information Panel on the left and the Activity & Engagement Panel on the right.
The Contact Information Panel
This left-hand panel contains all the stored data and properties associated with the contact.Profile Header
- Avatar, Name, and Contact Details: At a glance, you can see the contact’s name, phone number, and email address.
- Opt-in Status: A toggle switch shows if the contact is currently subscribed to your communications.
- Labels: Any labels you’ve assigned (e.g.,
DEMO GIVEN,FOLLOW UP) are displayed for quick context.
Quick Action Bar
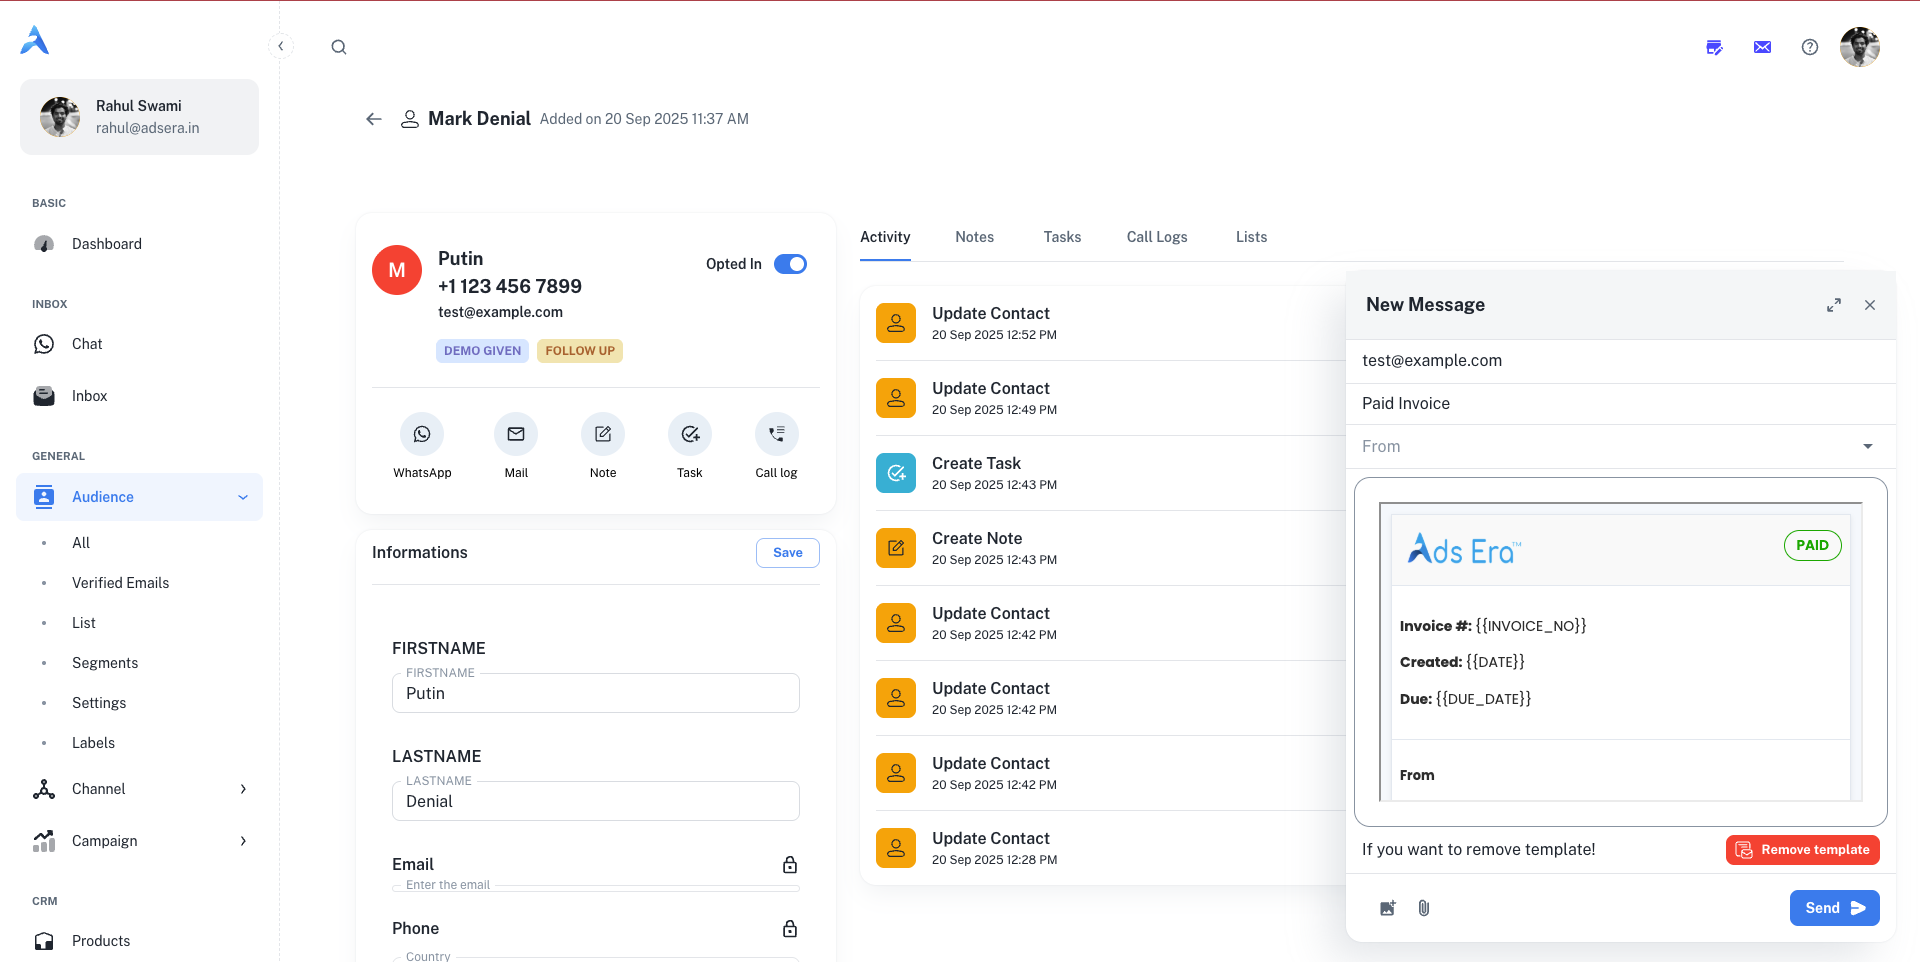
Beneath the header, a row of icons allows you to instantly engage with the contact:- WhatsApp: Opens the WhatsApp chat window to send a direct message.
- Mail: Opens the email composer to send an email.
- Note: Opens a modal to add a private note to the contact’s timeline.
- Task: Opens a modal to create and assign a task related to this contact.
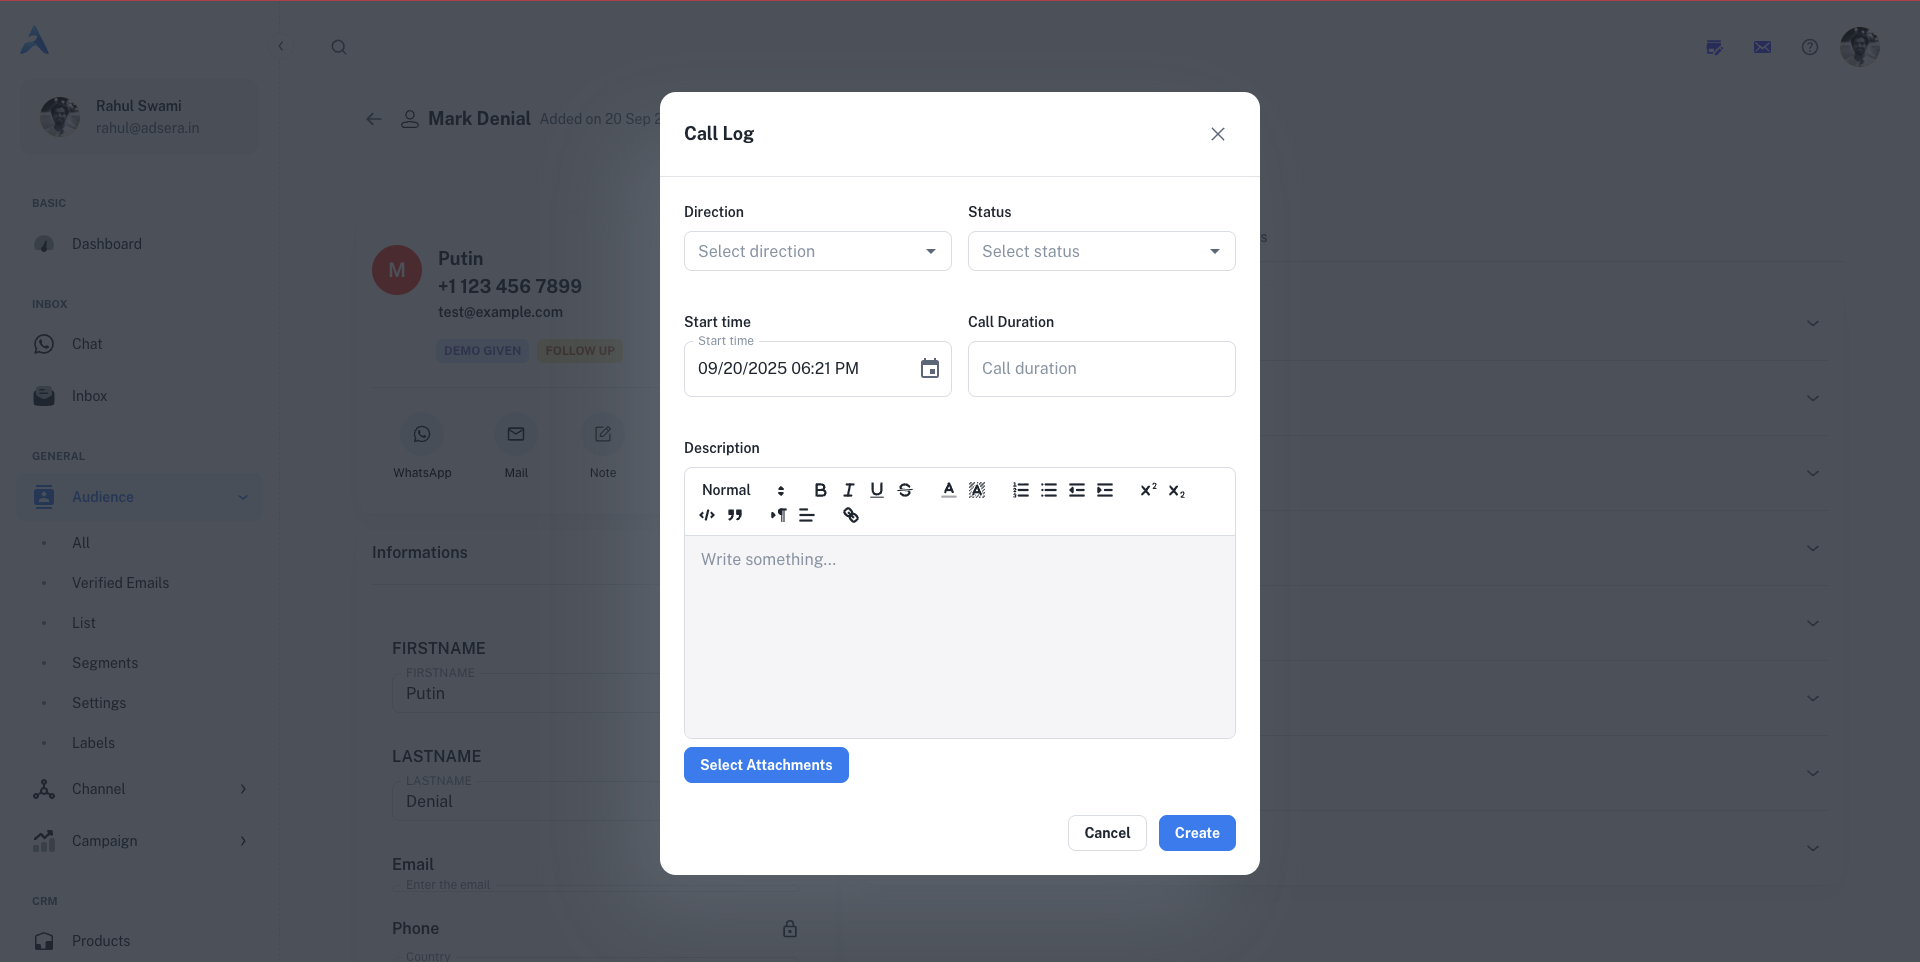
- Call log: Opens a modal to log a phone call you had with the contact.
Information Form
This section is a scrollable form containing all of the contact’s attributes.- Default Fields: Includes standard fields like
FIRSTNAME,LASTNAME,Email, andPhone.The primary Email and Phone number are locked and cannot be edited directly, as they are unique identifiers for the contact. - Custom Attributes: Displays any custom fields you have created (e.g.,
LEAD_TYPE,LEAD_STATUS). - Lists & Labels: Manage which lists the contact belongs to and add or remove labels.
- Subscriptions: Manually subscribe or unsubscribe the contact from your WhatsApp and Email marketing.
The Activity & Engagement Panel
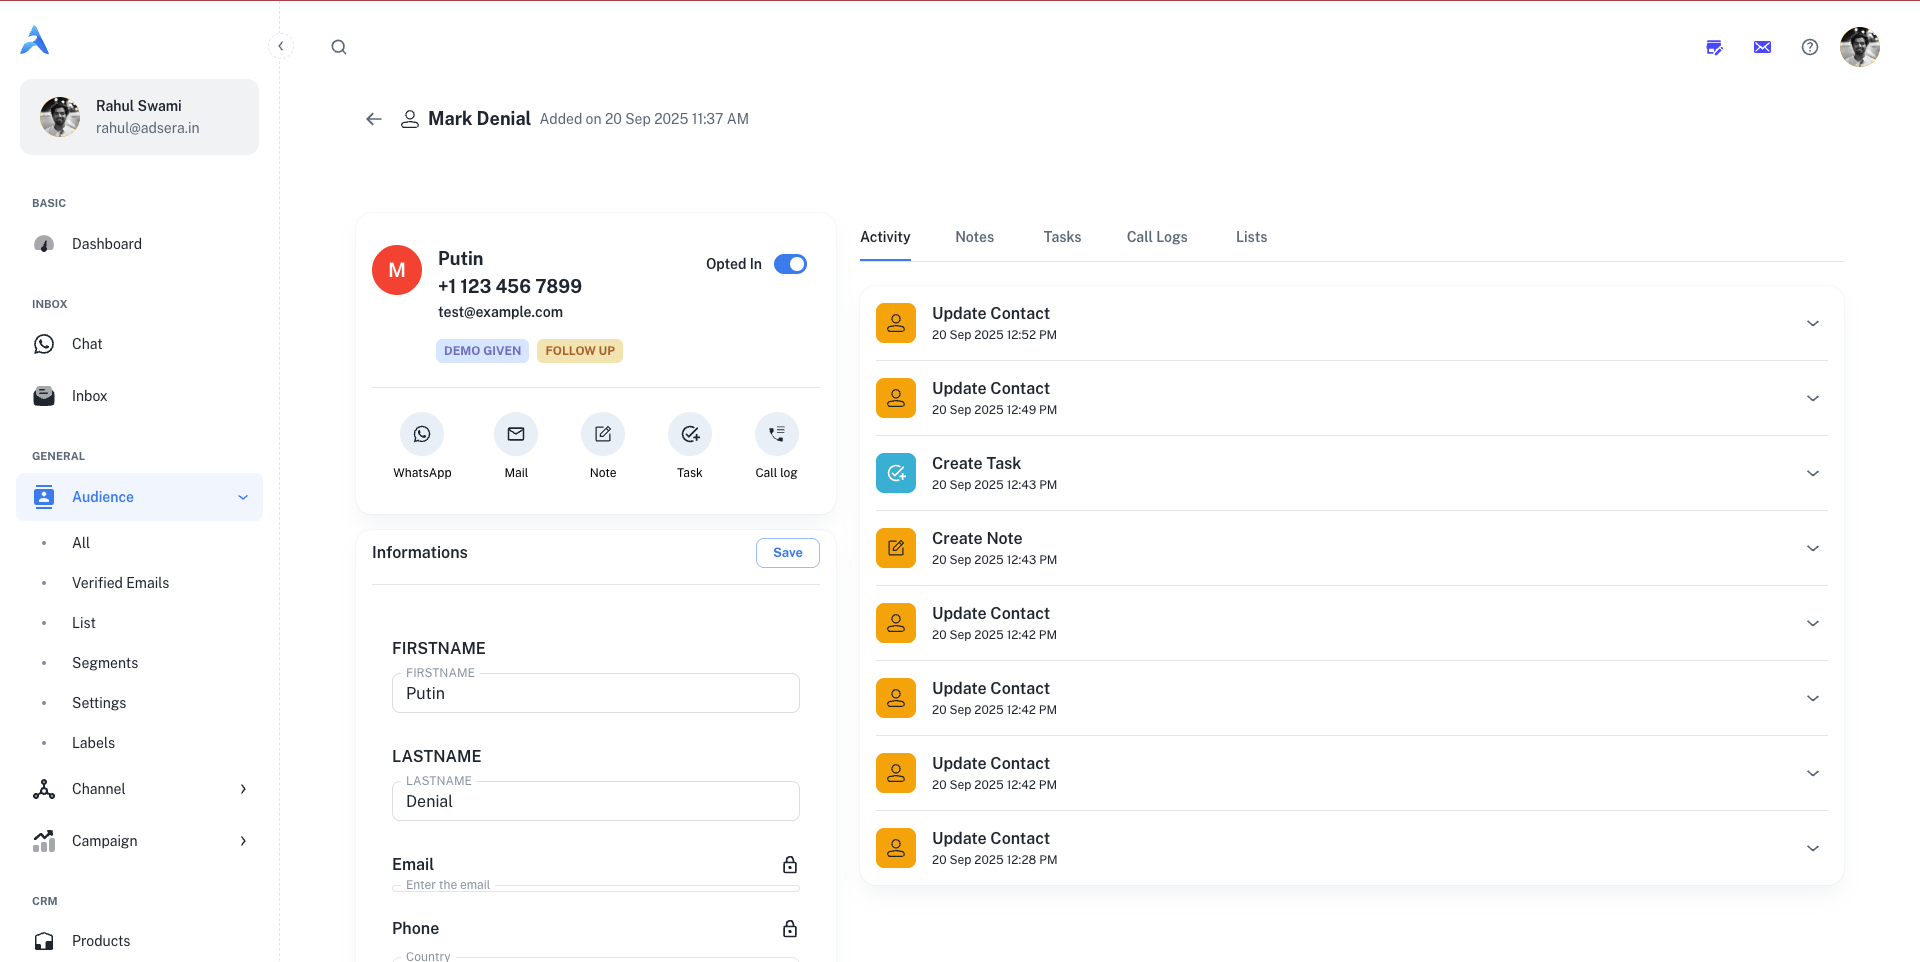
The right-hand panel is a tabbed interface that provides a complete history of all interactions and CRM-related activities for the contact.Activity
Activity
This is a chronological timeline of every interaction you’ve had with the contact. It includes sent campaigns, status updates, notes, tasks, and conversations, giving you a complete historical record.
Notes
Notes
A focused view of only the notes that have been added to the contact’s profile. Use the “Note” icon in the Quick Action Bar to add a new note using a rich text editor. Notes are internal and not visible to the contact.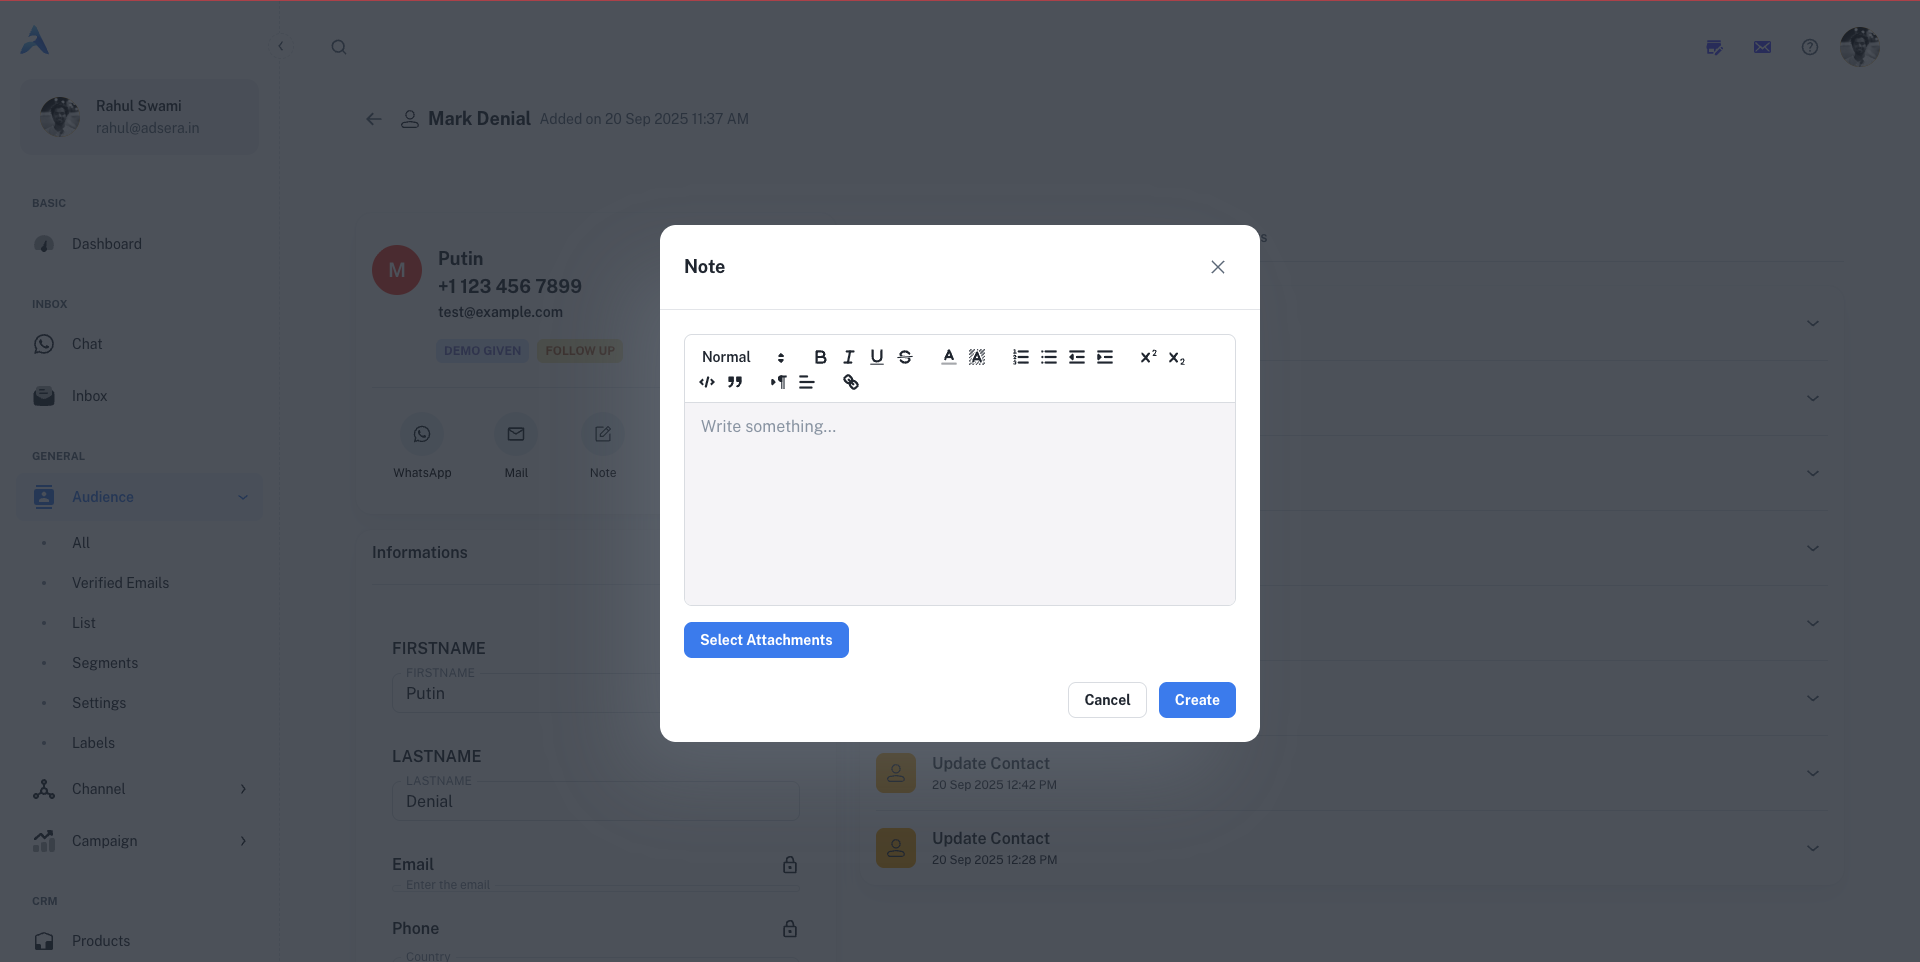
Tasks
Tasks
View all tasks associated with this contact. Click the “Task” icon to create a new task. You can set a title, status (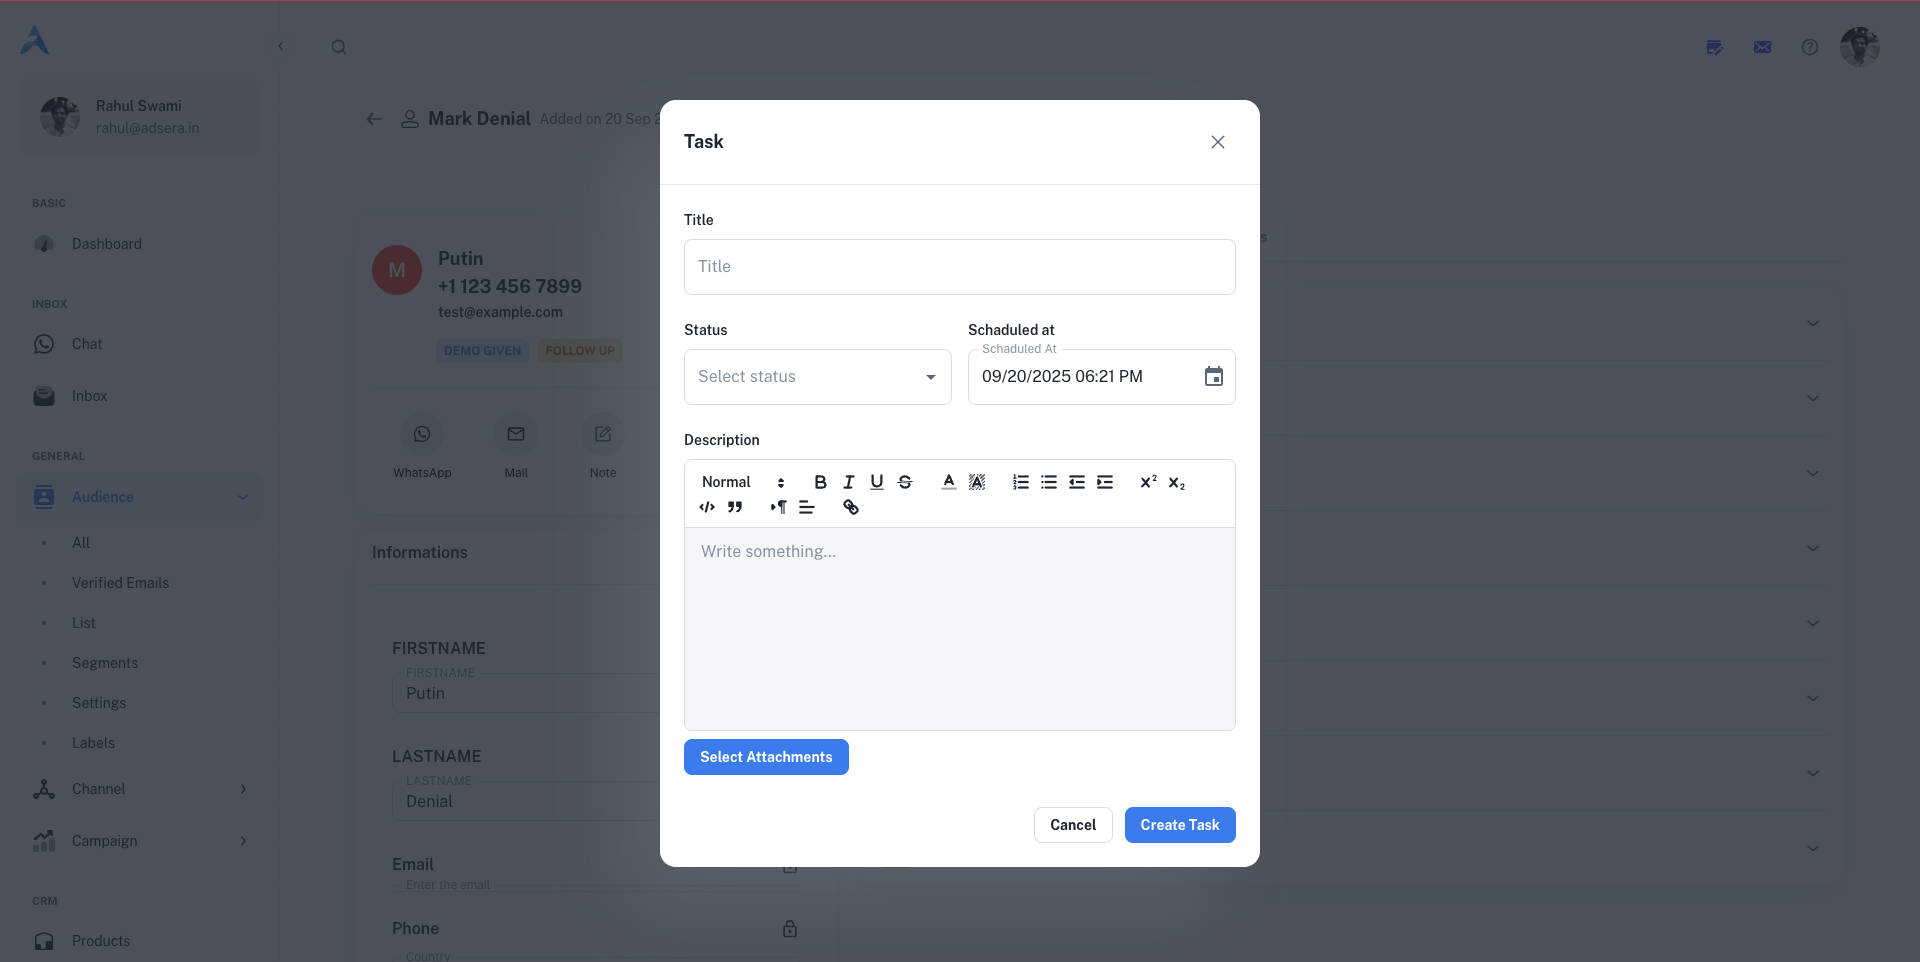
To-do, In Progress, Done), schedule a due date, and add a detailed description.Call logs
Call logs
Keep a record of your phone conversations. Click the “Call log” icon to open a modal where you can log the call’s direction (incoming/outgoing), status (completed, missed), start time, and duration, along with a detailed description.
Lists
Lists
See a simple list of all the contact lists this person is a member of.
Starting a Conversation
- Clicking the WhatsApp icon opens a side panel chat window, showing the entire conversation history with that contact. You can type a message, attach media, or use Templates and Snippets to reply instantly.

- Clicking the Mail icon opens a full-featured email composer, pre-filled with the contact’s email address, allowing you to write and send a direct email.