Understanding How Segments Work
Always Dynamic
Segments are not static snapshots. They update in real-time. If a contact’s data changes to meet a segment’s criteria, they are added. If they no longer meet the criteria, they are removed automatically.
Created from Filters
Segments are born from the filter builder on the All Audience page. This is where you define the rules. The Segments page is for viewing and managing the segments you’ve already saved.
How to Create a Segment
1. Navigate to All Audience
Go to the Audience > All Audience page.
2. Build Your Filters
Use the advanced filter builder to define the criteria for your desired segment. You can combine multiple conditions using AND/OR logic.
3. Save Filters as a Segment
Once you are satisfied with the filtered view of contacts, click the “Save as Segment” button.
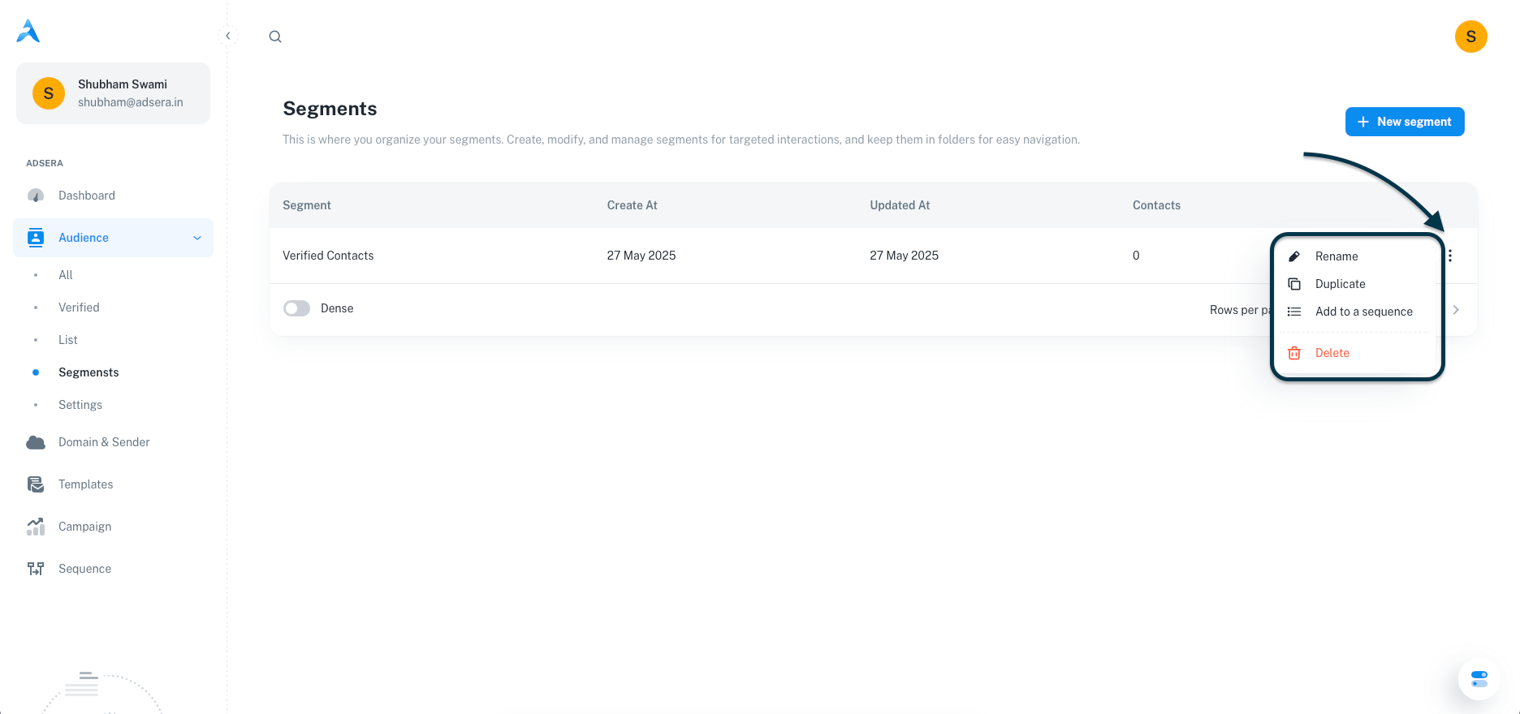
Managing Your Segments
The Segments page provides a clean overview of all the dynamic segments you’ve created.The Segments Table
The table displays your segments with the following columns:- Segment name: The name you assigned when creating the segment.
- Created At: The date and time the segment was originally saved.
- Updated At: The date and time the segment was last modified.
- Contacts: A dynamic count of contacts who currently match the segment’s criteria. This number can change frequently.
Segment Actions (The ⋮ Menu)
Clicking the three-dot menu on any segment row reveals several actions:- Rename: Opens a modal to change the segment’s display name.
- Duplicate: Creates a new segment with the exact same filter rules, which you can then modify.
- Add to Sequence: Adds all contacts currently matching the segment to a specific automation sequence.
- Delete: Permanently removes the segment’s definition.