Dedicated IP Required: You can only send email campaigns from a dedicated IP address. AdsEra does not permit sending campaigns without one to protect deliverability for all users. To acquire a dedicated IP, please Contact Us.
Navigating to Your Campaigns
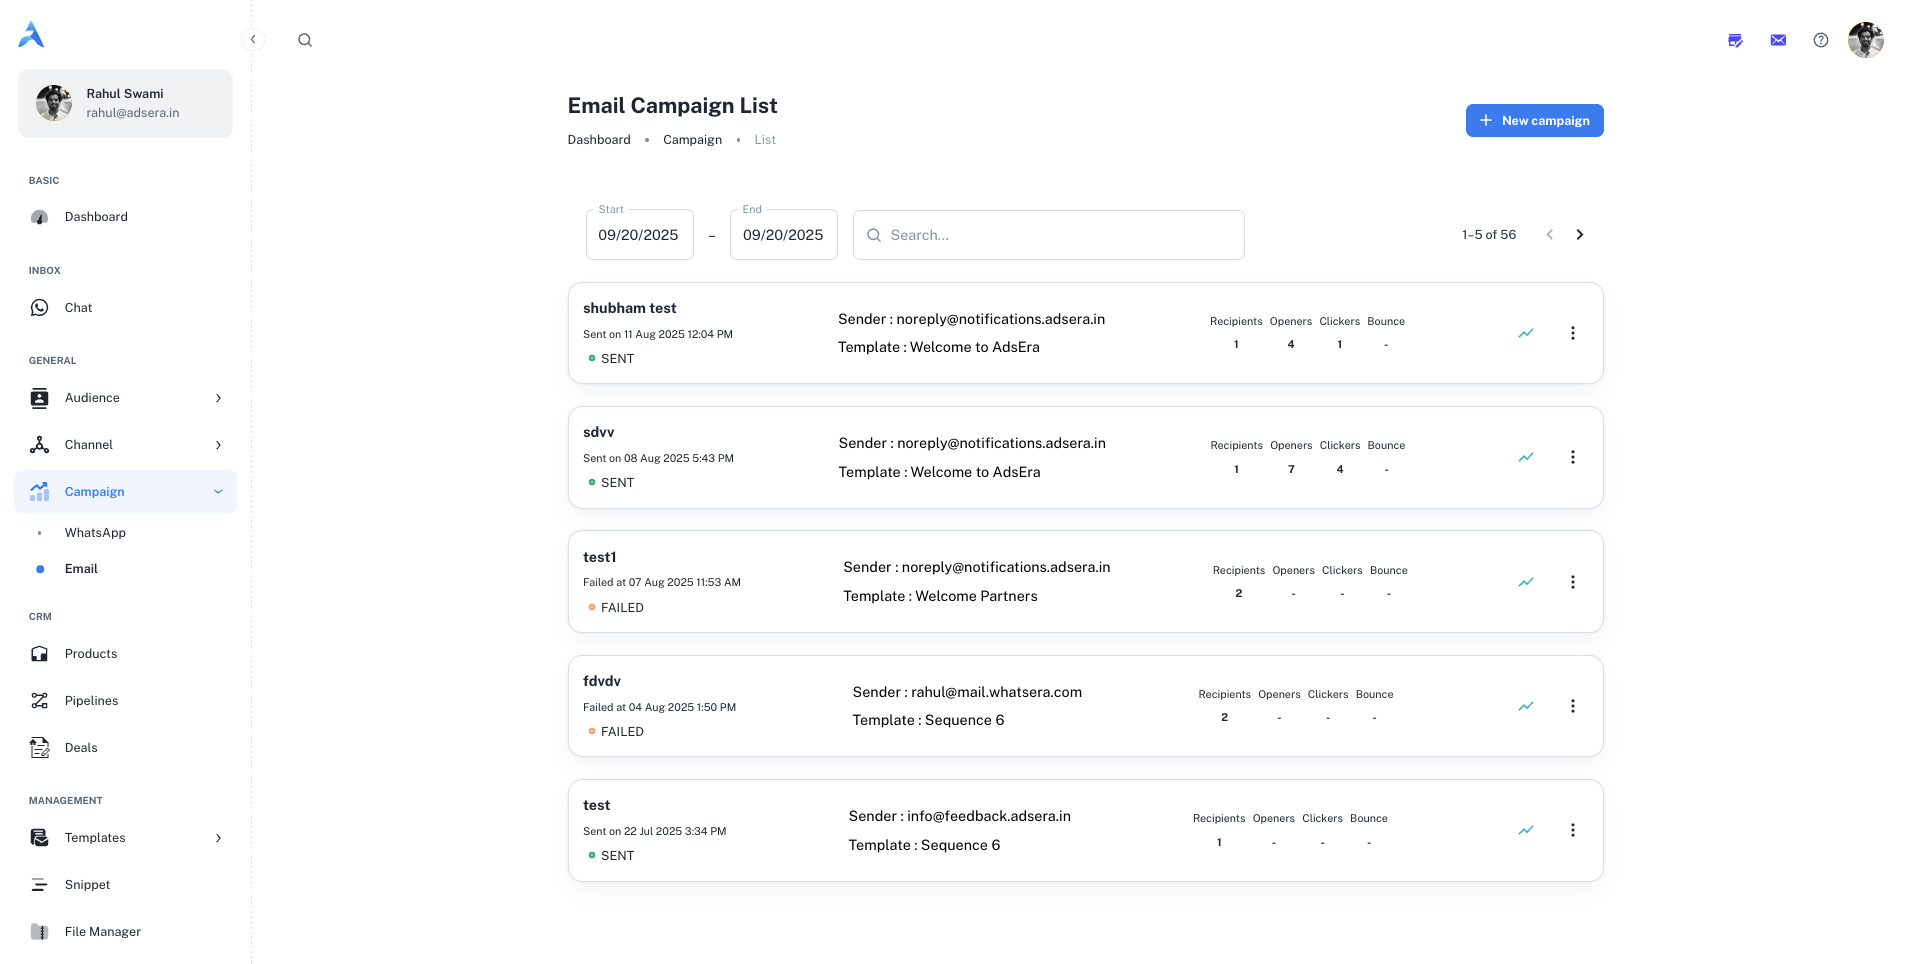
Accessing your Campaign List is simple:Select Campaigns
From your AdsEra Dashboard, click on Campaigns then Email in the left-hand navigation bar.
Anatomy of a Campaign Card
Each card on your Campaign List represents an individual email campaign and provides key information at a glance. Here’s a detailed breakdown of what you’ll see:| Section | Field / Metric | Description |
|---|---|---|
| Header | Campaign Name | The internal name you assigned to your campaign for easy identification. |
| Sent On / Last Updated | The date and time the campaign was sent. For drafts, this shows the last update time. | |
| Status Tag | A color-coded tag indicating the campaign’s current status: - DRAFT: Created but not yet sent. - SENT: Successfully sent to your recipients. - FAILED: Encountered an error and could not be sent. | |
| Details | Sender | The email address from which the campaign was sent (e.g., info@adsera.in). |
| Template | The name of the email template used for the campaign. | |
| Metrics | Recipients | The total number of unique contacts the campaign was intended for. |
| Openers | The number of unique recipients who opened your email. | |
| Clickers | The number of unique recipients who clicked at least one link. | |
| Failure | The number of emails that failed to deliver (e.g., bounced). |
Searching and Filtering Your Campaigns
To help you find specific campaigns quickly, you can filter your list by a date range at the top of the page.- Click on the Start date field to open a calendar and select a beginning date.
- Click on the End date field to open a calendar and select an end date.
Actions: Managing Your Campaigns
Each campaign card offers direct actions to help you manage your campaigns effectively.Creating a New Campaign
Creating a New Campaign
To start building a brand new email campaign, click the ”+ New campaign” button located at the top left of the page. This will take you to the campaign creation wizard.For a full walkthrough, see our guide on Creating an Email Campaign.
Viewing a Detailed Report
Viewing a Detailed Report
For any sent campaign, click the “View complete campaign analysis” button to go to a detailed report. Here you can find in-depth statistics like click-through rates, unsubscribe rates, and geographical data.Learn more in our guide to Analyzing Campaign Reports.
Using the More Options (⋮) Menu
Using the More Options (⋮) Menu