> ## Documentation Index
> Fetch the complete documentation index at: https://docs.adsera.in/llms.txt
> Use this file to discover all available pages before exploring further.
# Managing Email Sequences
> A complete guide to creating, managing, and populating your automated email sequences for lead nurturing and customer engagement.
The **Sequences** feature is your dedicated hub for managing automated email journeys, drip campaigns, and lead nurturing flows. Sequences allow you to send a series of pre-defined emails to your contacts over time, triggered by specific actions or additions to a list.
**Want to manage Sequences? [Go to the AdsEra Sequences Page →](https://app.adsera.in/dashboard/sequence/list)**
This guide will cover everything you need to know, from managing your list of sequences to building a new one and enrolling contacts.
## The Sequence Dashboard
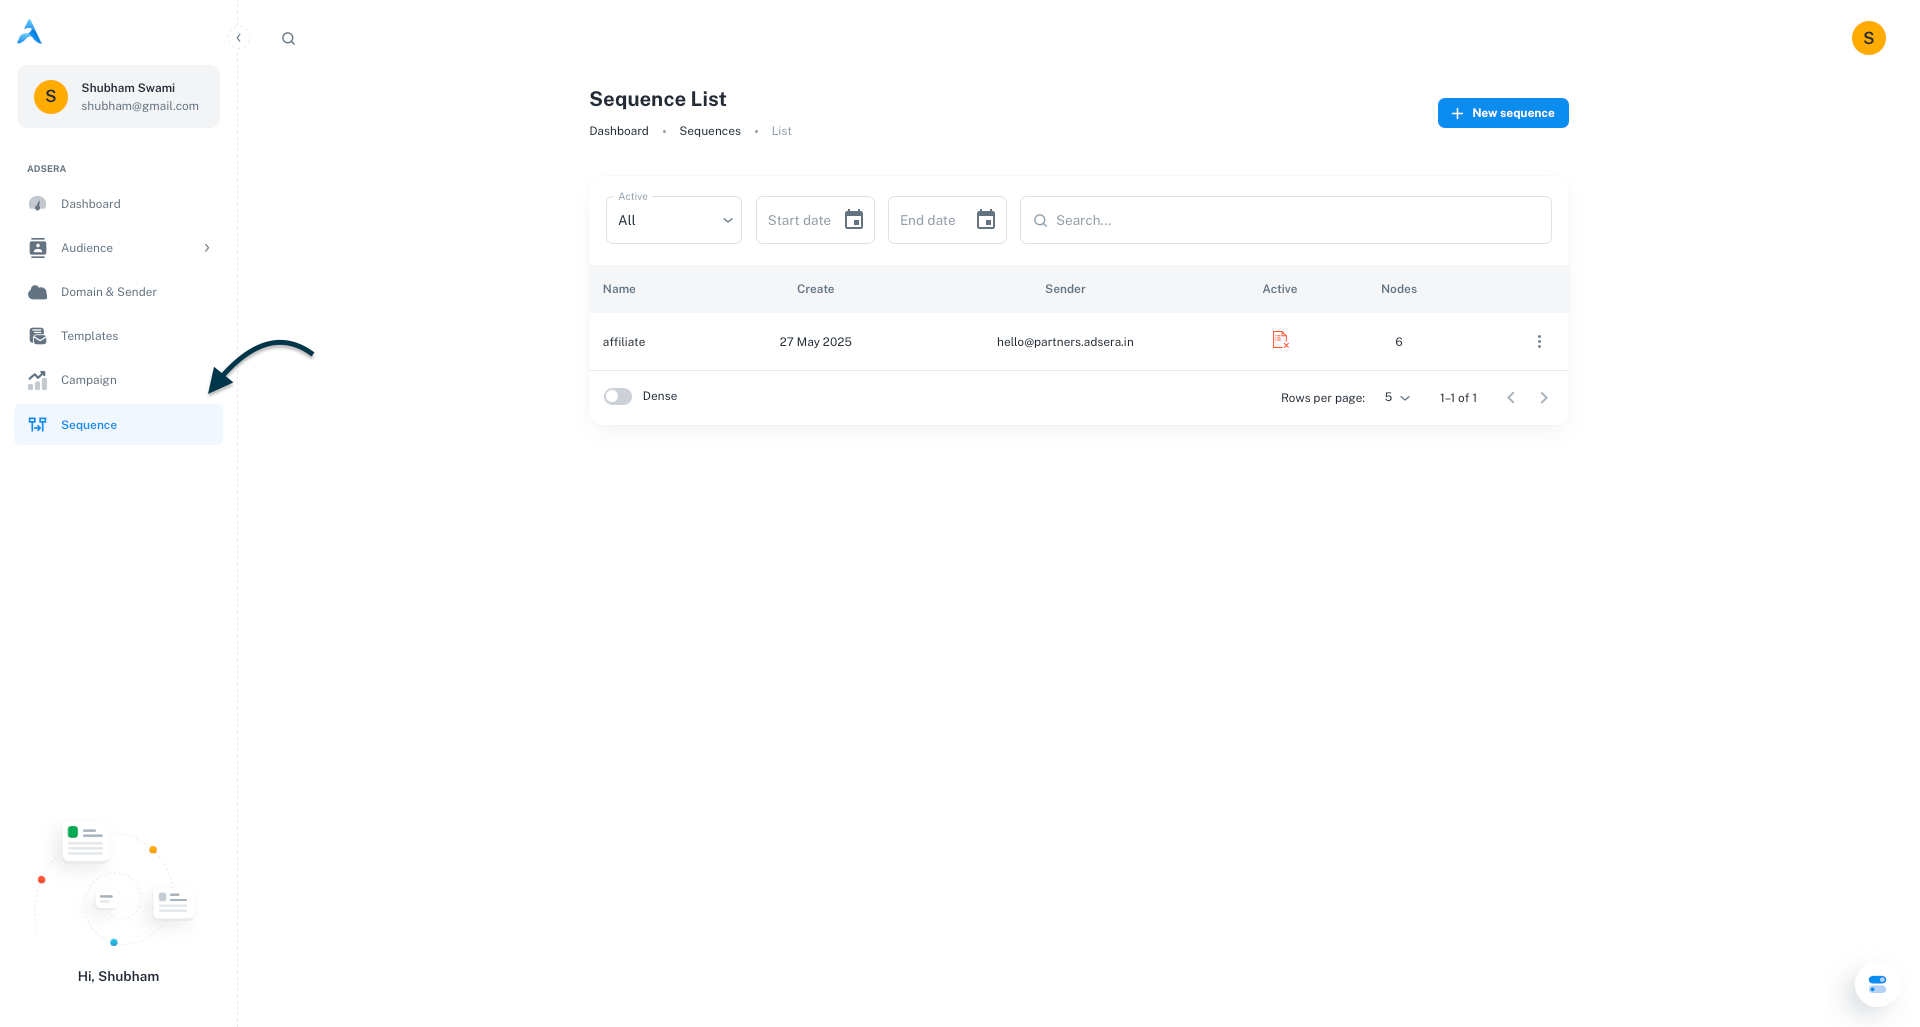
This is your main view for all your automated email sequences. From here, you can get a high-level overview of your automations, see their status, and jump into editing or creating new ones.
#### Understanding the Sequence List
| Column | Description |
| :--------- | :---------------------------------------------------------------------------------------- |
| **Name** | The unique internal name you've given to your sequence (e.g., "New Customer Onboarding"). |
| **Create** | The date and time when the sequence was originally created. |
| **Sender** | The default sender email address configured for this sequence. |
| **Active** | A toggle switch indicating if the sequence is currently `ON` and enrolling new contacts. |
| **Nodes** | The total number of steps or emails configured within the sequence. |
#### Filtering Your Sequences
At the top of the page, you can filter your list to find specific sequences:
* **Active / All Toggle:** Switch between viewing only `Active` sequences or `All` of them.
* **Date Range Filters:** Use the **Start date** and **End date** pickers to find sequences created within a specific period.
***
## How to Create a New Sequence
Click the **"+ New sequence"** button to launch the creation wizard, which will guide you through building your automated journey.
A pop-up will appear, prompting you for the core properties of your sequence:
* **Name:** An internal name for your sequence (e.g., "Post-Purchase Follow-up").
* **Choose a Sender:** Select the default "From" email address for this sequence.
* **Choose a List (Optional):** This is a powerful auto-enrollment trigger. If you select a list here, any contact who is added to this list will automatically be enrolled in this sequence.
Click **Next** to proceed to the sequence builder canvas.
You will now see a visual canvas where you can build out the steps (or "nodes") of your sequence. A node is a combination of an email template and a time delay.
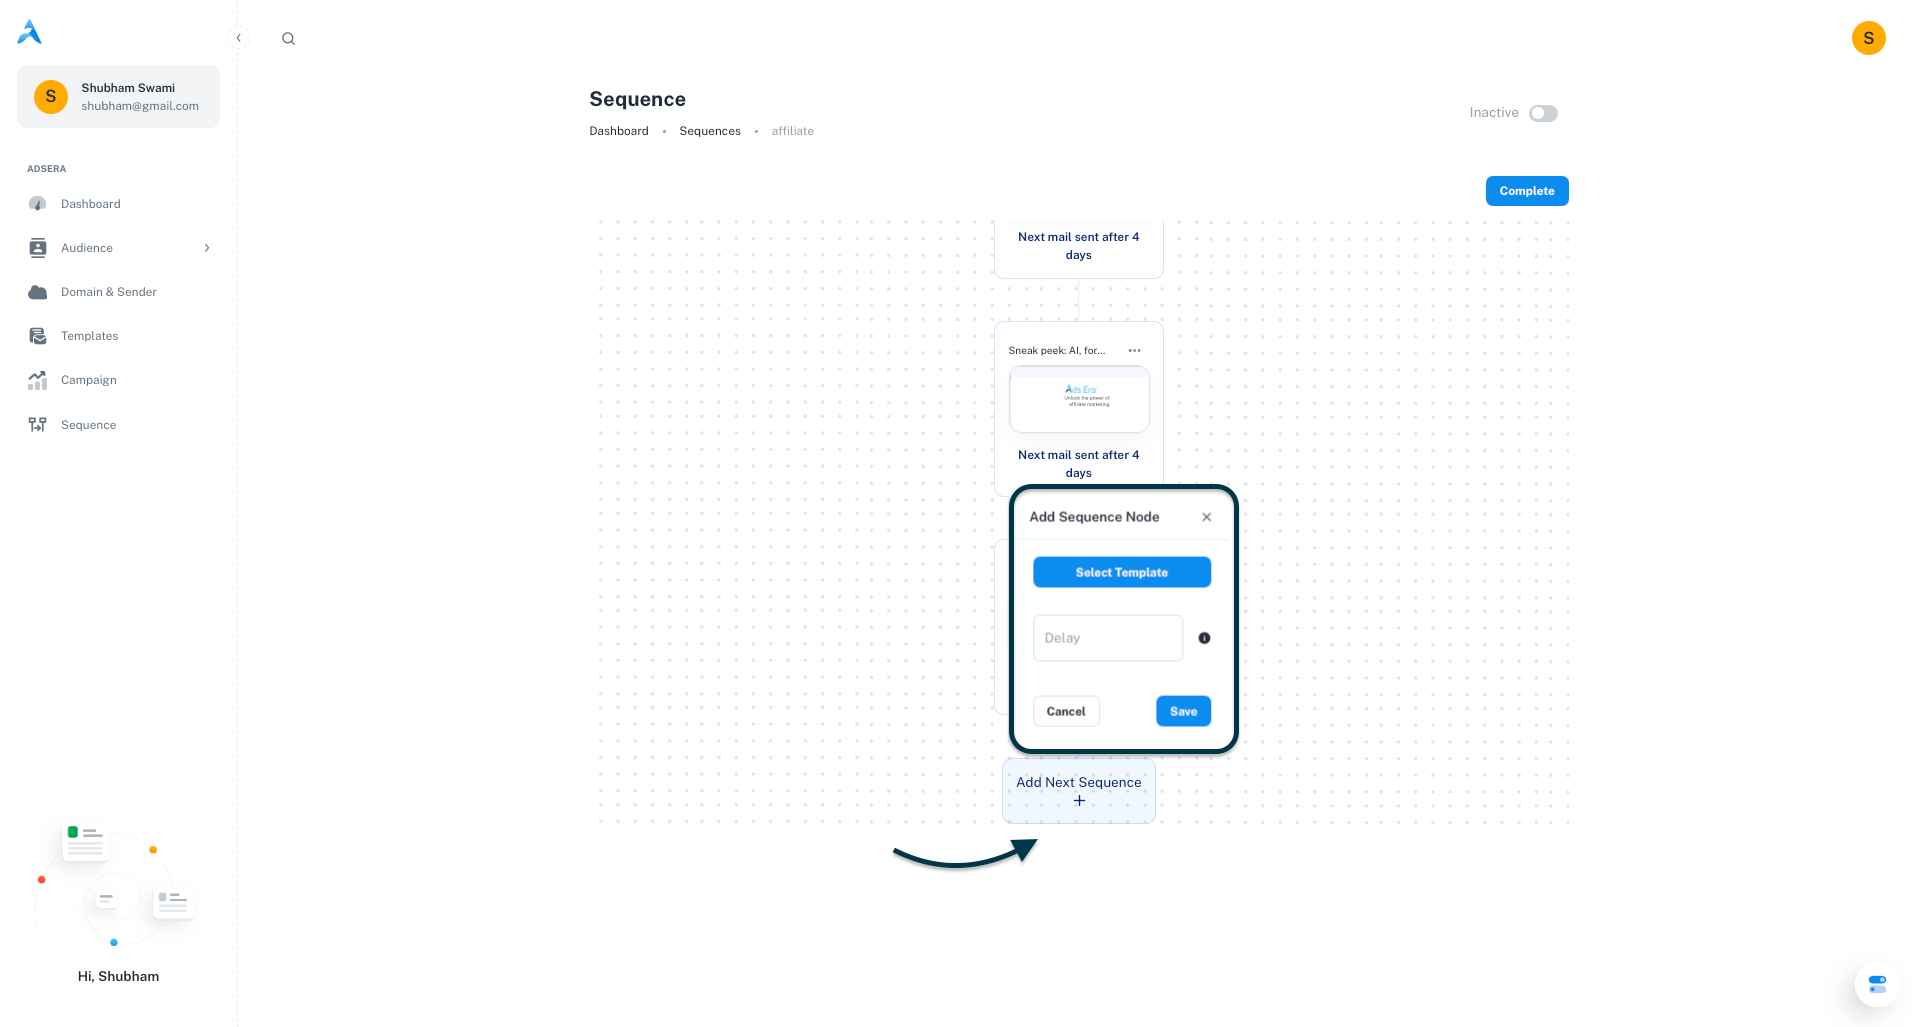
* **Add a Node:** Click the **"Add Next Sequence"** button.
* **Select Template:** In the pop-up, choose the email template for this step from the dropdown. You should create your templates beforehand in the [Templates](/help/template/email-list) section.
* **Set Delay:** Enter the number of days to wait before sending this email.
* For the *first* step, a delay of `0` sends the email immediately after a contact is enrolled.
* For all subsequent steps, the delay is calculated from when the *previous* email was sent.
Continue adding nodes until your entire email journey is mapped out on the canvas.
* **Complete:** Once your flow is designed, click the **"Complete"** button at the top right. This saves the sequence and returns you to the list.
* **Activate:** Your new sequence is **INACTIVE** by default. To start it, find it in the list and either click the **toggle switch** under the "Active" column or use the **three-dots (...) menu** and select **Activate**.
An inactive sequence will not enroll contacts or send any emails. You must activate it manually for it to start working.
***
## Enrolling Contacts into a Sequence
There are two primary ways to add contacts to an active sequence:
This is the easiest method for ongoing enrollment. If you selected a contact list in the "Choose a List..." field during the initial setup (Step 1), any new contact added to that list will be automatically enrolled into this sequence. This is perfect for welcome series or onboarding flows.
This method is for adding existing contacts to a sequence.
Navigate to **Audience > All**.
Use the checkboxes to select one or more contacts.
Click the **"More action"** button and select **"Add to a sequence"** from the menu.
In the pop-up, choose the target sequence and click **"Add"**.