> ## Documentation Index
> Fetch the complete documentation index at: https://docs.adsera.in/llms.txt
> Use this file to discover all available pages before exploring further.
# Creating an Email Campaign
> A step-by-step guide to building, designing, targeting, and scheduling your email campaigns for maximum impact.
**Want to Create Email Campaigns? [Go to the AdsEra Campaign Create Page →](https://app.adsera.in/dashboard/campaign/create/EMAIL)**
Creating a campaign in AdsEra involves a structured process, breaking down the task into manageable sections: **Name**, **Sender**, **Recipients**, **Design**, **Reply to**, and **Schedule**. Each step is designed to give you precise control over your campaign's identity, content, audience, and timing.
### Before You Begin: A Quick Checklist
Know what you want to achieve (e.g., promote a product, send a newsletter) and have a clear internal campaign name in mind.
Ensure your desired "From" email address has been set up as a [Sender](/help/channel/email/emaill?tab=senders) and know which contacts you want to reach (a list, a segment, or a custom filter).
Have your message ready, or an existing template in mind, and know when you want your campaign to be delivered.
***
## Building Your Campaign: Step-by-Step
After navigating to the **Campaigns** then **Email** page and clicking **"+ New campaign"**, you will be guided through the following setup wizard.
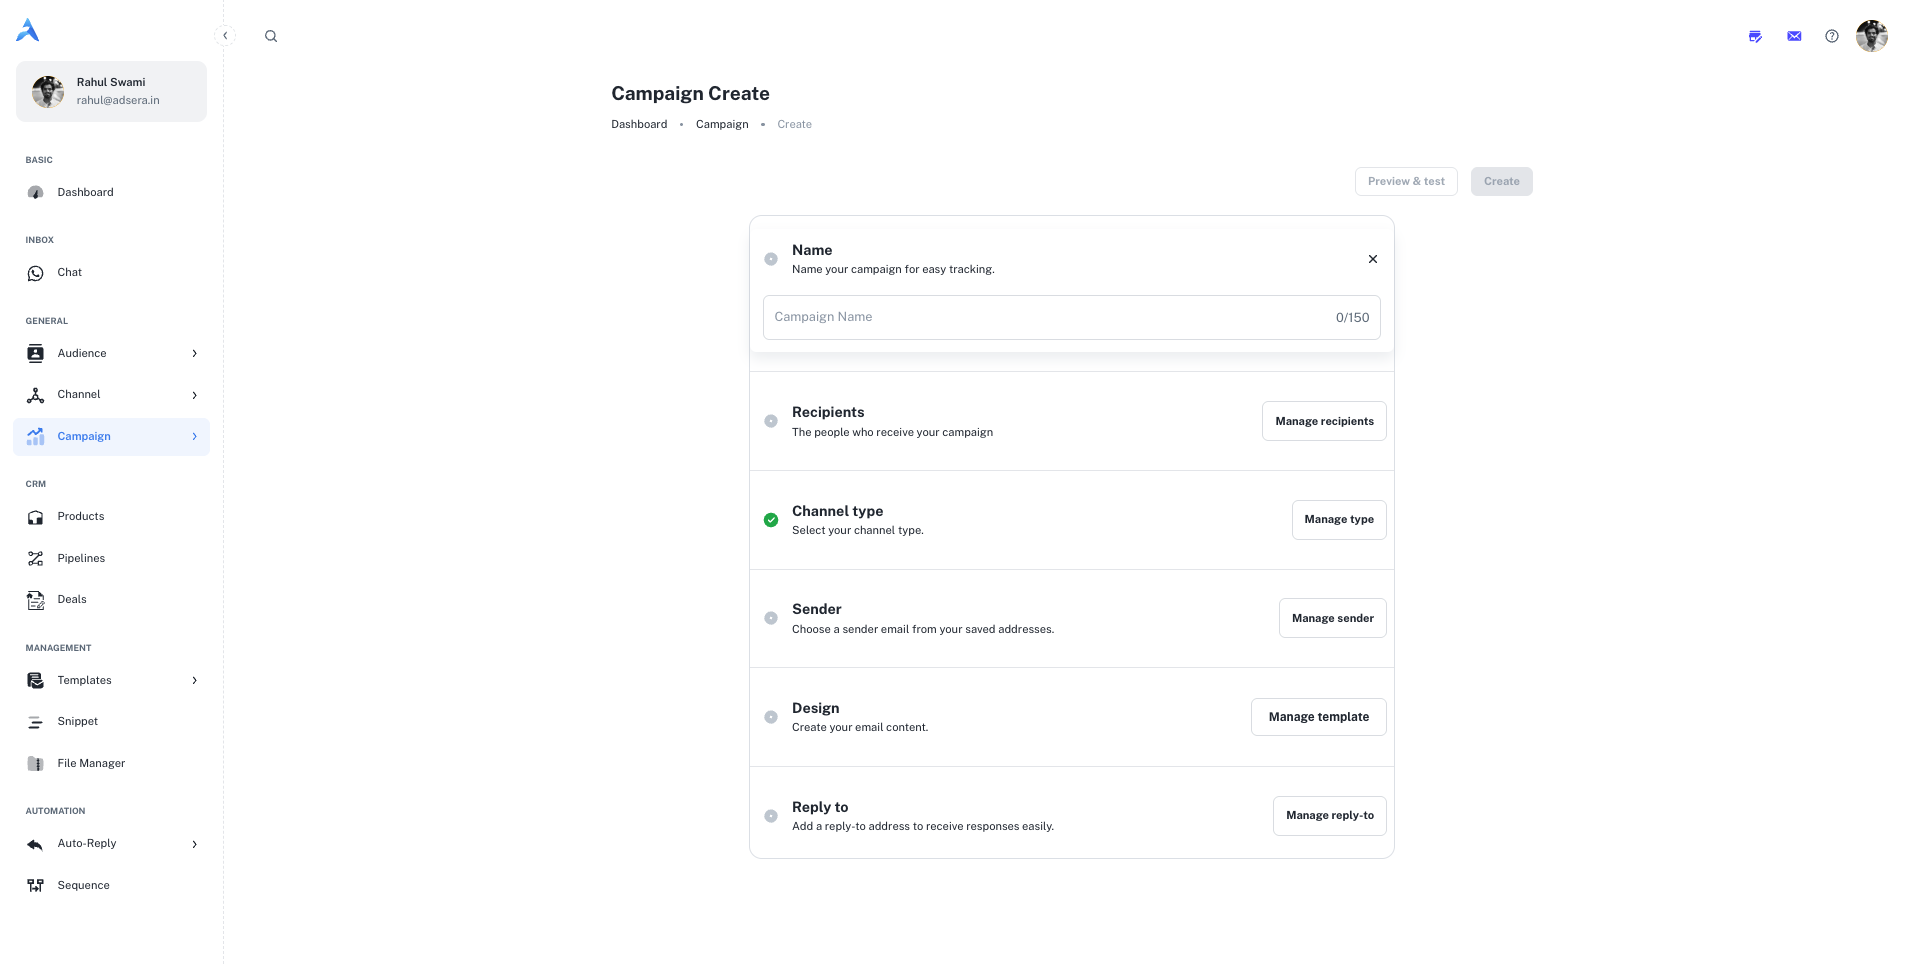
This is an internal name for easy identification within AdsEra (e.g., "Summer Sale Q3 2025," "July Newsletter"). It is not visible to recipients. The name can be up to 150 characters.
This section defines the "From Name" and "From Email" that your recipients will see. Select a pre-verified sender from the dropdown menu.
**Pro Tip:** Always use a recognizable and professional sender name and email to build trust and improve open rates. Avoid "no-reply" addresses.
This is a critical step where you select who will receive your campaign. AdsEra offers powerful options for targeting:
* **Select Lists:** Choose one or more of your static contact lists.
* **Select Segments:** Target dynamic, rule-based segments of your contacts (e.g., "Engaged Subscribers").
* **Filter Recipients (Advanced):** For the most granular control, build a custom filter for this specific campaign using various contact attributes and `AND`/`OR` logic.
For more on this, see our guide on [All Audience & Segments](/help/audiance/audiance).
This crucial step determines the type of campaign you will create. Choose the channel your audience prefers for the best engagement. The options you see in later steps, such as design and sender selection, will change based on your choice here.
Select this option to create a traditional email campaign. You will design rich HTML content, choose from your verified email senders, and track metrics like opens and clicks.
Select this option to send a message directly to contacts on WhatsApp. You will use pre-approved Message Templates and can leverage rich media for high-impact, conversational messaging.
Click **"Start designing"** to create your email. You have several options:
* **Layouts:** Start with a basic structural layout.
* **Template Gallery:** Select from AdsEra's collection of professionally pre-built, customizable templates.
* **My Templates:** Reuse any of your previously saved templates for brand consistency.
* **Code Your Own:** For advanced users, use the intuitive drag-and-drop **Email Builder** or directly **Paste your code** in the HTML editor.
Specify where you want to receive replies. It's best to use an email address that is actively monitored by your team to enable prompt engagement with interested recipients.
Decide when your campaign will be sent.
* **Send Immediately:** To send the campaign as soon as you finish the setup.
* **Schedule for a Future Date/Time:** Pick a specific date and time for delivery, allowing you to plan ahead and optimize send times for your audience.
Before launching, click the **"Preview & test"** button in the top right. Send a test email to yourself to check:
* Subject lines and preheaders.
* Content formatting and image display.
* That all links are working correctly.
* That personalization tags (like `{{FIRSTNAME}}`) are populating as expected.
***
## Pro Tips for Campaign Creation
Develop a standard naming system for your campaigns (e.g., `[Year]-[Month]-[Campaign Type]-[Audience]`) for easy organization and reporting later on.
The more targeted your recipient list, the more effective your campaign will be. Use segments and filters to deliver highly relevant content that resonates with specific audience groups.
If your audience is global, consider scheduling your campaign at optimal times across different time zones to maximize engagement.
Before hitting "Send" or "Schedule," always perform one last review of all your campaign settings: Name, Sender, Recipients, Content, Reply-To, and Schedule.