> ## Documentation Index
> Fetch the complete documentation index at: https://docs.adsera.in/llms.txt
> Use this file to discover all available pages before exploring further.
# Managing Segments
> Learn how to view, manage, and use your dynamic contact segments for precision targeting.
**Segments** are dynamic groups of contacts created by applying and saving filters in the [All Audience](/help/audiance/audiance) view. Think of them as living, breathing subdivisions of your audience that automatically update based on the criteria you define. They are a powerful tool for precision targeting.
**Want to Manage Contact Segments? [Go to the AdsEra Segments Page →](https://app.adsera.in/dashboard/contact/segments)**
### Understanding How Segments Work
Segments are not static snapshots. They update in real-time. If a contact's data changes to meet a segment's criteria, they are added. If they no longer meet the criteria, they are removed automatically.
Segments are born from the filter builder on the **All Audience** page. This is where you define the rules. The Segments page is for viewing and managing the segments you've already saved.
***
## How to Create a Segment
Go to the [Audience > All Audience](/help/audiance/audiance) page.
Use the advanced filter builder to define the criteria for your desired segment. You can combine multiple conditions using **AND/OR** logic.
Once you are satisfied with the filtered view of contacts, click the **"Save as Segment"** button.
Give your segment a clear, descriptive name that reflects its rules (e.g., "Active High-Value Customers") and save it. It will now appear on this Segments page.
***
## Managing Your Segments
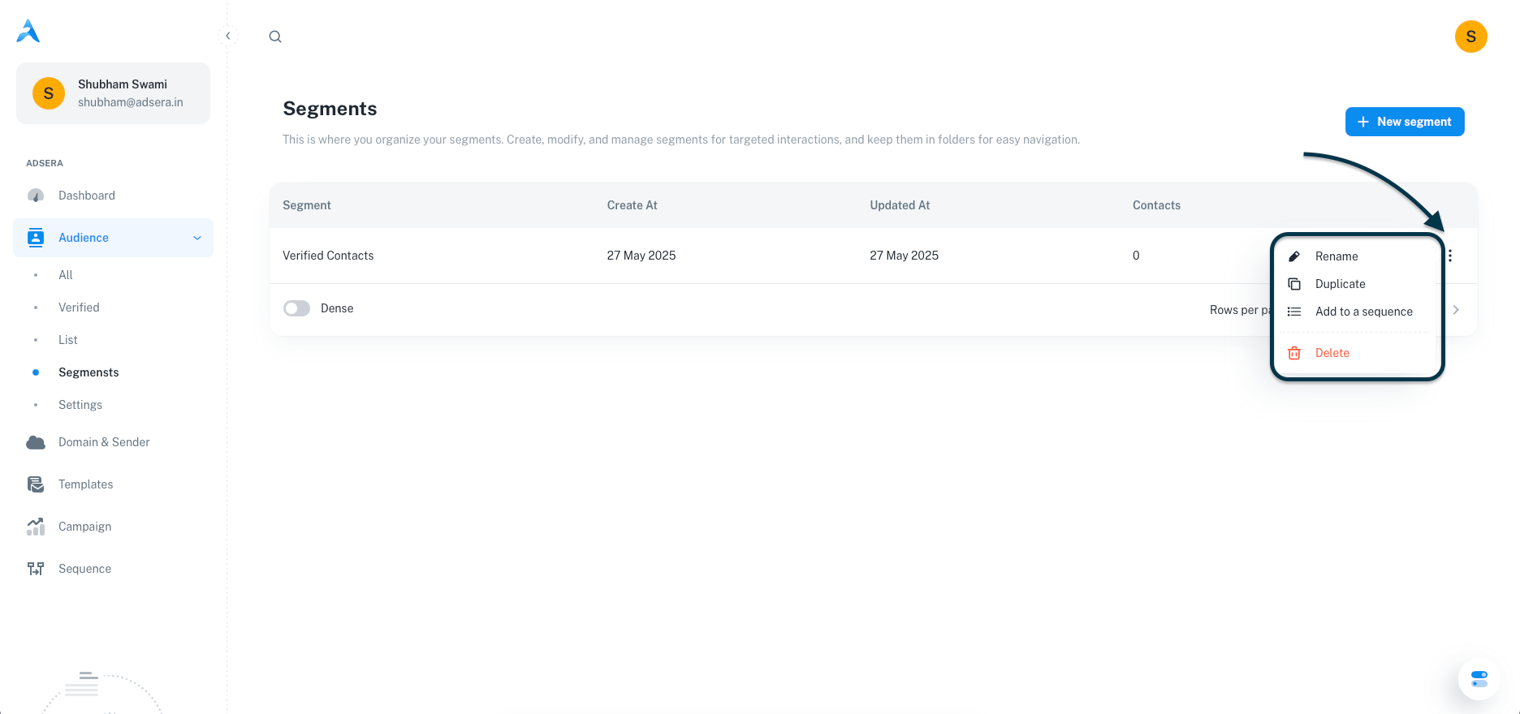
The Segments page provides a clean overview of all the dynamic segments you've created.
#### The Segments Table
The table displays your segments with the following columns:
* **Segment name:** The name you assigned when creating the segment.
* **Created At:** The date and time the segment was originally saved.
* **Updated At:** The date and time the segment was last modified.
* **Contacts:** A **dynamic count** of contacts who currently match the segment's criteria. This number can change frequently.
#### Segment Actions (The ⋮ Menu)
Clicking the three-dot menu on any segment row reveals several actions:
* **Rename:** Opens a modal to change the segment's display name.
* **Duplicate:** Creates a new segment with the exact same filter rules, which you can then modify.
* **Add to Sequence:** Adds all contacts **currently matching** the segment to a specific automation sequence.
* **Delete:** Permanently removes the segment's definition.
Deleting a segment **does not** delete any contacts from your audience. It only removes the saved set of rules.