> ## Documentation Index
> Fetch the complete documentation index at: https://docs.adsera.in/llms.txt
> Use this file to discover all available pages before exploring further.
# Import Contacts via Copy-Paste
> Add contacts by copying and pasting data directly from a spreadsheet without needing to upload a file.
This guide will walk you through importing your contacts quickly and easily using the copy-paste feature. This method is perfect for smaller lists or when you have data readily available in a spreadsheet.
**Want to Import Contacts via Copy-Paste? [Go to the AdsEra Contact Import Page →](https://app.adsera.in/dashboard/contact/import/option)**
### Prerequisites
Before you start, make sure you have the following:
Have your contact information ready in a spreadsheet (like Google Sheets or Excel) or a text editor.
Your data **must** include either an `EMAIL` or a `PHONE` column. At least one of these is required to identify and manage contacts.
Remember, you must have your contacts' consent to send them marketing campaigns.
***
## Step-by-Step Import Process
Follow these steps to import your contacts using the copy-paste method.
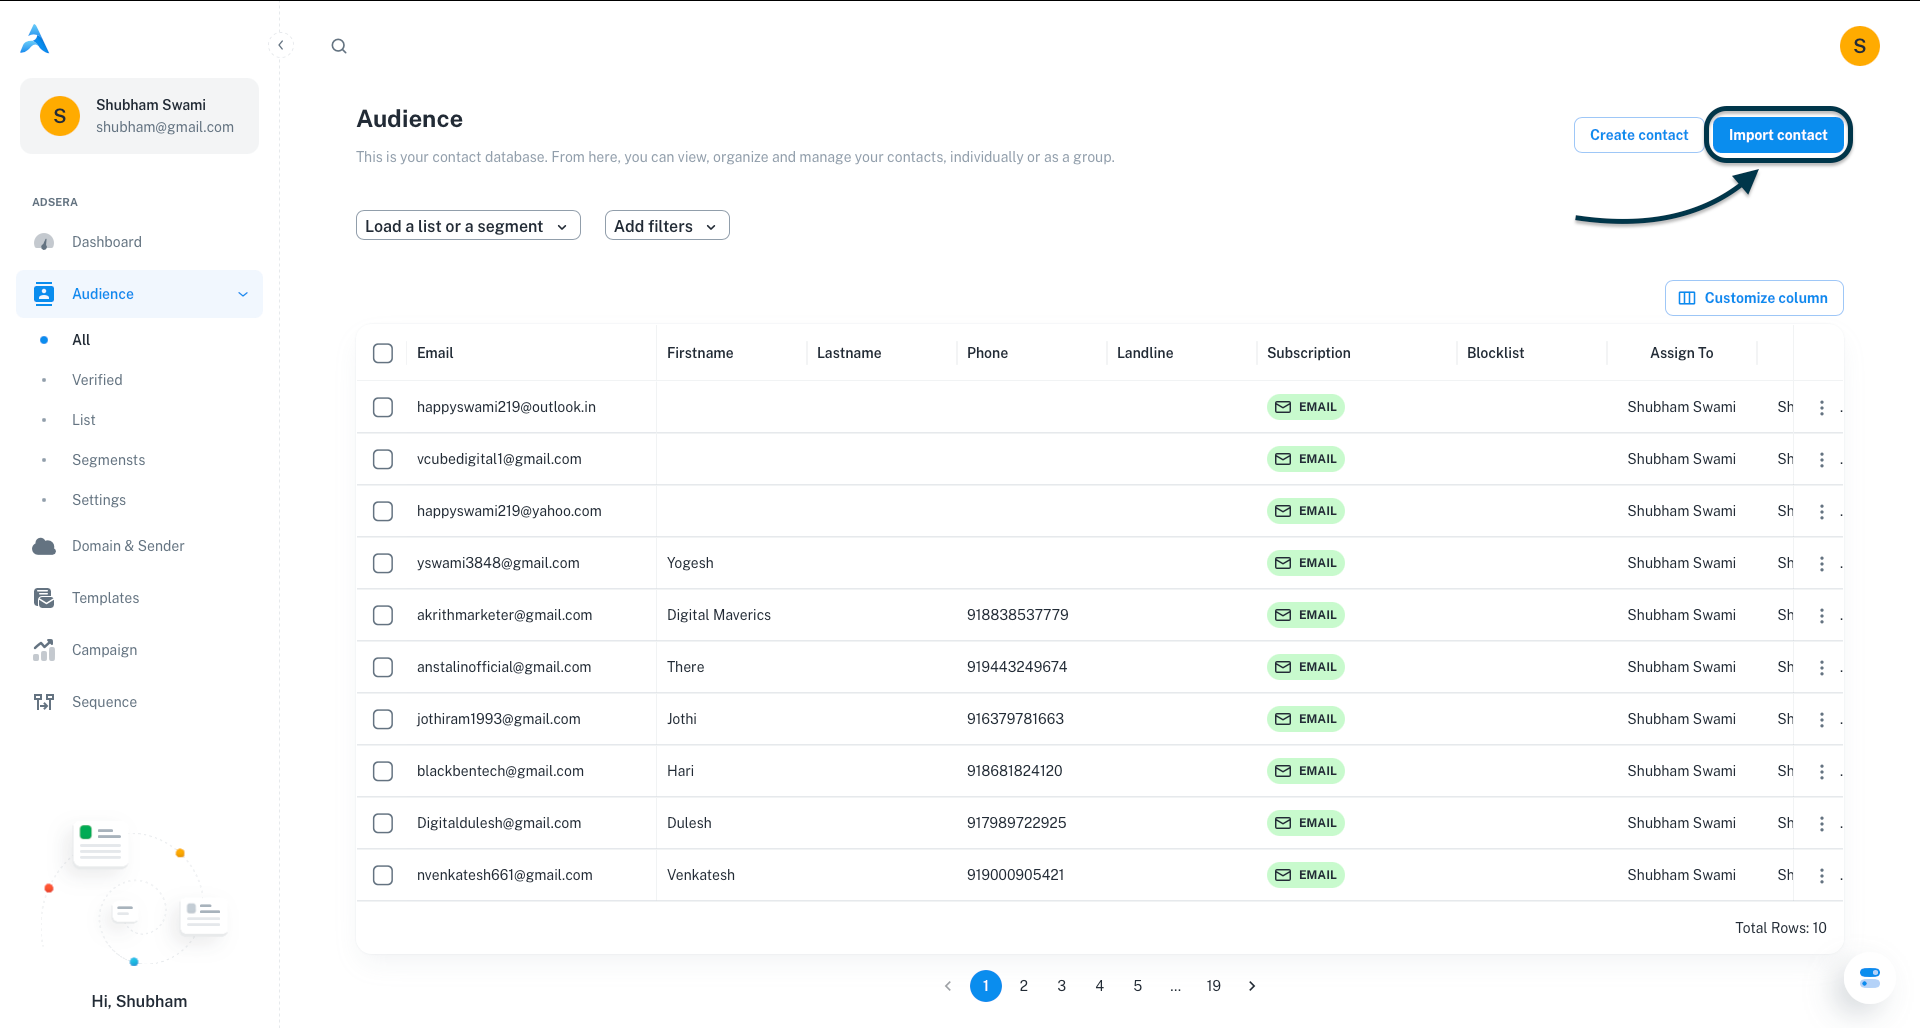
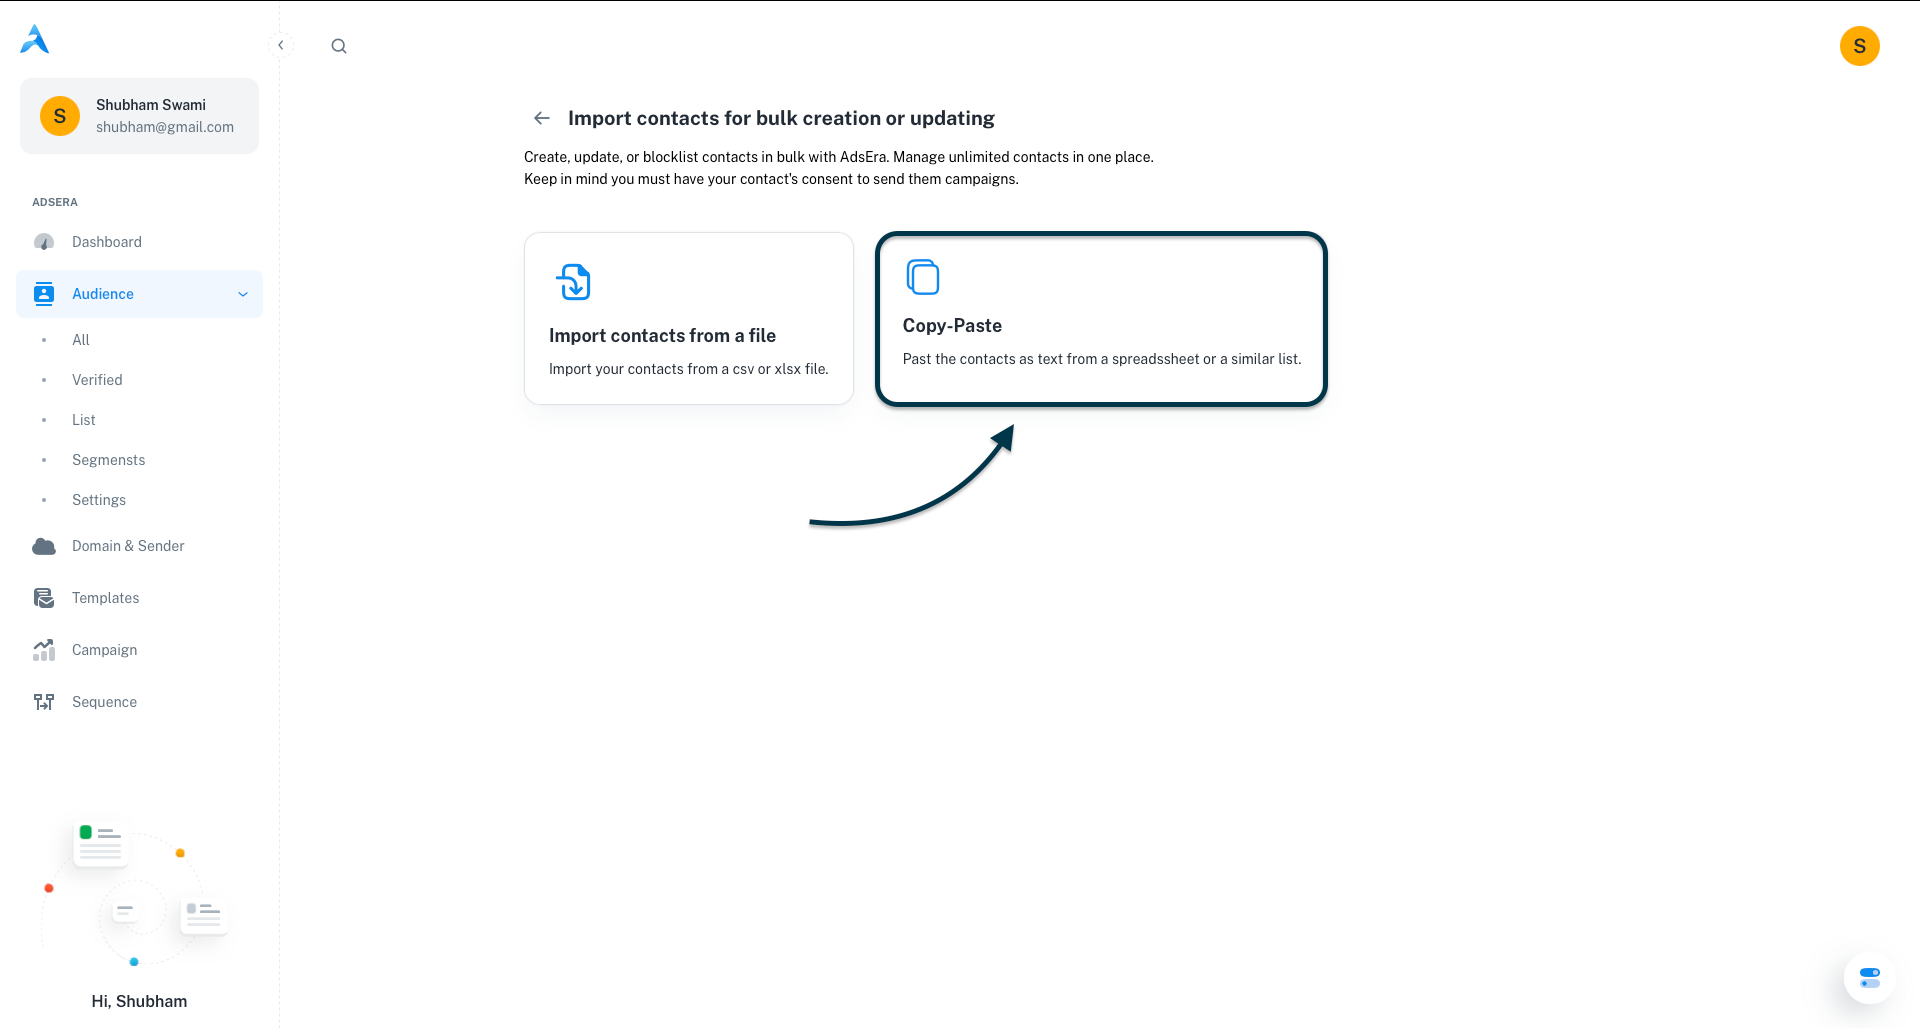
From your AdsEra Dashboard, navigate to **Audience > All**. In the top-right corner, click the **Import contact** button. On the next screen, select the **Copy-Paste** method.
Before pasting, ensure your data is correctly formatted in your spreadsheet or text file.
* **Column Headers:** Your data must start with a header row (e.g., `EMAIL`, `FIRSTNAME`).
* **Comma-Separated:** Each value in a row must be separated by a comma.
* **Required & Optional Columns:** `EMAIL` is mandatory. You can also include `FIRSTNAME`, `LASTNAME`, `PHONE`, and `LANDLINE`. Any extra columns will be saved as custom attributes.
Here's an example of the expected syntax:
```csv theme={null}
EMAIL,FIRSTNAME,LASTNAME,PHONE,COMPANY
emma@example.com,Emma,Dubois,33612345678,Innovate Inc.
mickael@example.com,Mickael,Parker,15555551234,Solutions Corp
```
Once formatted, select and copy your data (including the header row).
Paste your copied data directly into the text area provided on the import screen, then click Next.
AdsEra will display a preview of your data in a table. Review it to ensure your columns and rows appear correctly, then click Next.
This crucial step matches your data columns to the corresponding fields in AdsEra. The system will attempt to auto-map them.
Verify Mapping: Ensure each "Column name from imported file" is correctly matched to a "Column name on AdsEra".
Set Duplicate Handling: For each column, choose an action for updating existing contacts:
Overwrite: Replaces existing data with the new data.
Fill only if empty: Only adds data if the field is currently blank.
Skip: Ignores the new data for that field if the contact already exists.
Every contact you import must be assigned to at least one list.
Select an existing list: Choose from your current contact lists.
Create a new list: Click the "Create A List" button and give your new list a name.
Once you've selected a list, click Upload.
Congratulations! Your contacts are now being imported. After processing, you'll receive a confirmation report detailing the number of successful and failed imports, along with reasons for any failures.