> ## Documentation Index
> Fetch the complete documentation index at: https://docs.adsera.in/llms.txt
> Use this file to discover all available pages before exploring further.
# All Audience
> A central hub to view, manage, filter, and take bulk actions on all your contacts.
The **All Audience** table is your command center for contact management. It's a powerful, interactive database designed to give you a complete and actionable view of every person you connect with, whether they came from a CSV import, a form, or were added manually.
**Want to manage you Audience? [Go to the All Audience Page →](https://app.adsera.in/dashboard/contact/list)**
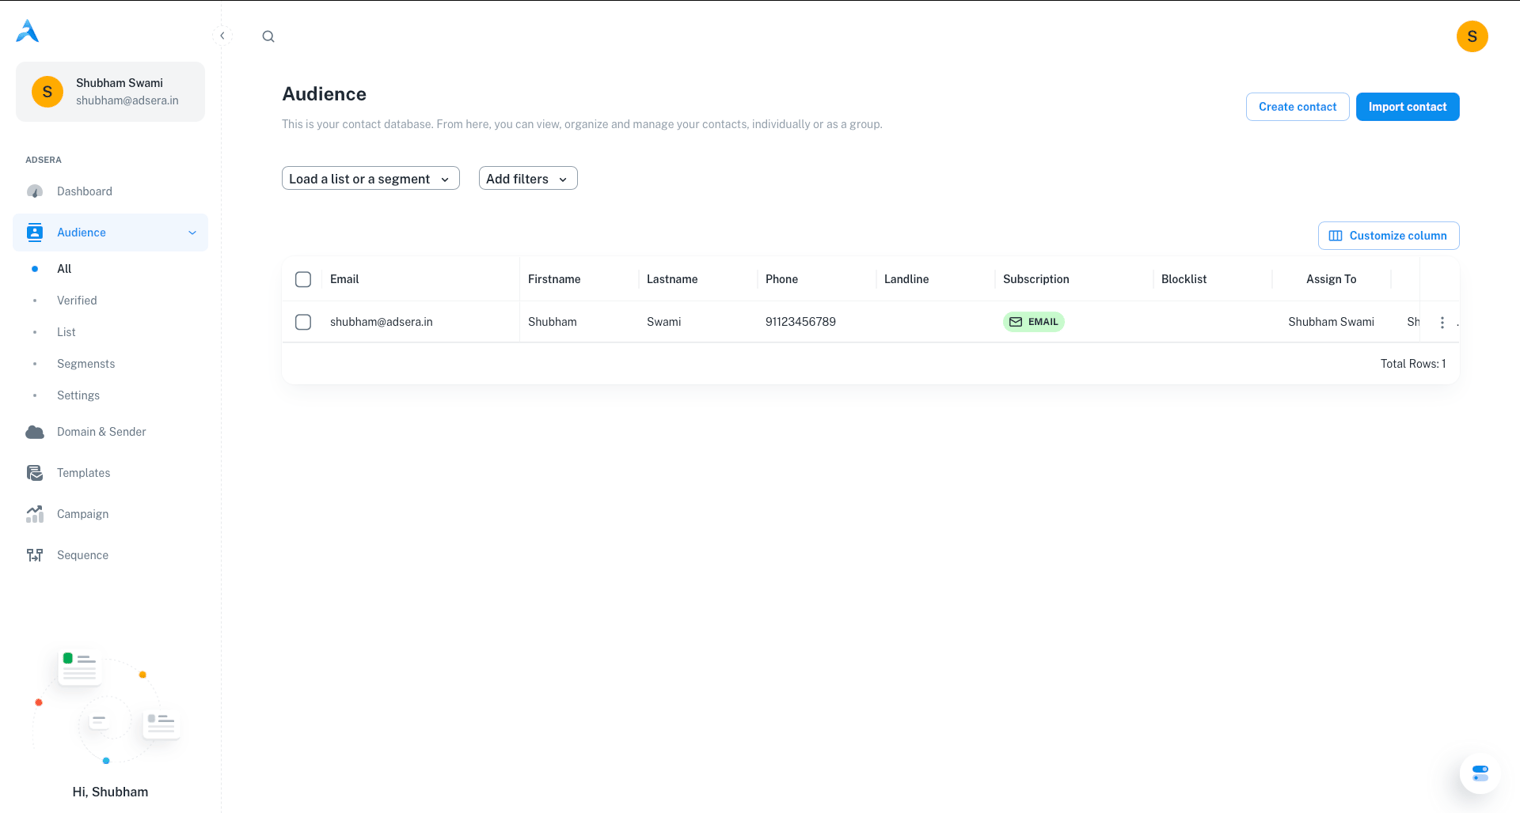
From this single screen, you can get a quick overview, search for specific people, sort data, and use powerful filters to find hyper-specific groups for your campaigns.
Grow your audience by adding contacts one by one or by importing them in bulk from a file.
Use the advanced filter builder to find any group of contacts based on their data and behavior.
Show, hide, and reorder columns to create a personalized table view that matches your workflow.
Save time by applying tags, adding contacts to lists, exporting, or deleting thousands of contacts at once.
***
## Adding Contacts
Your audience table grows with your business. Here’s how to add new contacts and when to use each method:
This is perfect for adding a single contact on the fly, like a new prospect you just met. Click the **"Create Contact"** button, fill out the form with their details, and they'll instantly appear in your table.
This is your go-to for adding contacts in bulk. It's essential when migrating from another platform or uploading a list of event attendees. You'll upload a CSV file and **map** the columns in your file to the corresponding attributes in AdsEra.
***
## The Core Workflow: Filter, Save, Repeat
The true power of the All Audience page lies in its filtering capabilities. This workflow allows you to find hyper-specific groups and save them for reuse.
Click the **"Add filters"** button to open the filter builder. Here, you can create rules to segment your audience with precision.
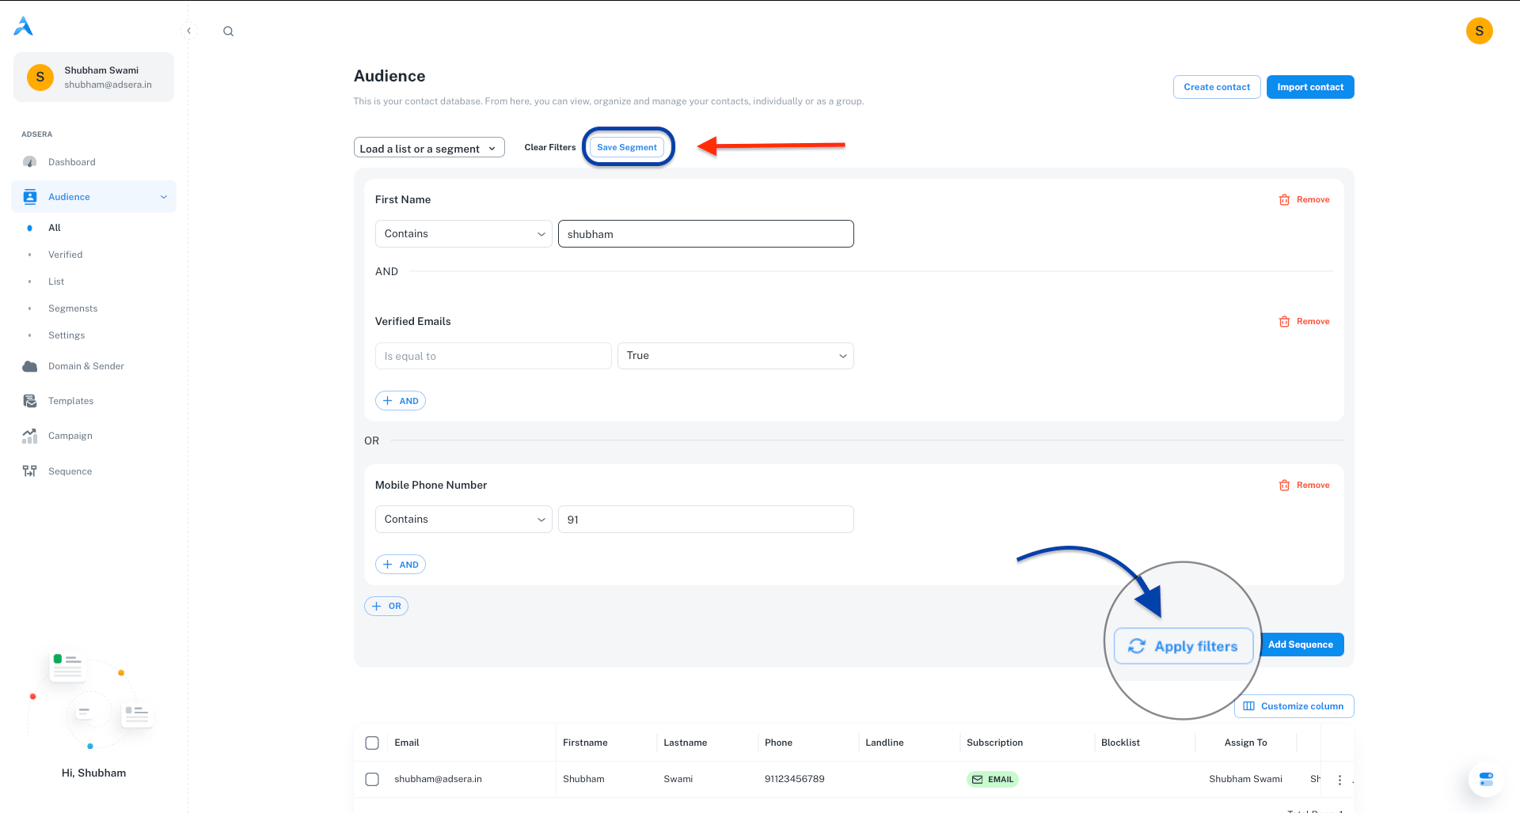
A filter consists of three parts:
* **Attribute:** The data point you want to examine (e.g., `City`, `Last Seen Date`, `Total Spent`).
* **Condition:** The logic you want to apply (e.g., `is`, `is not`, `greater than`, `contains`).
* **Value:** The specific data you're looking for (e.g., `New York`, `30 days ago`, `500`).
You can chain rules together with **AND** (for more specific results) or **OR** (for broader results).
Once you've built a filter that isolates a valuable group of contacts, don't let it go to waste! Click the **"Save as Segment"** button that appears.
Give your segment a descriptive name (e.g., "Active High-Value Customers"). This new segment is **dynamic**—it will automatically update, adding or removing contacts as they meet (or no longer meet) the filter rules you set.
Anytime you want to view a specific group, use the **"Load a list or a segment"** dropdown at the top of the page. This gives you one-click access to your manually created **Lists** (static groups) and your rule-based **Segments** (dynamic groups).
***
## Customizing and Managing the Table
Tailor the table to your needs and manage your contacts at scale.
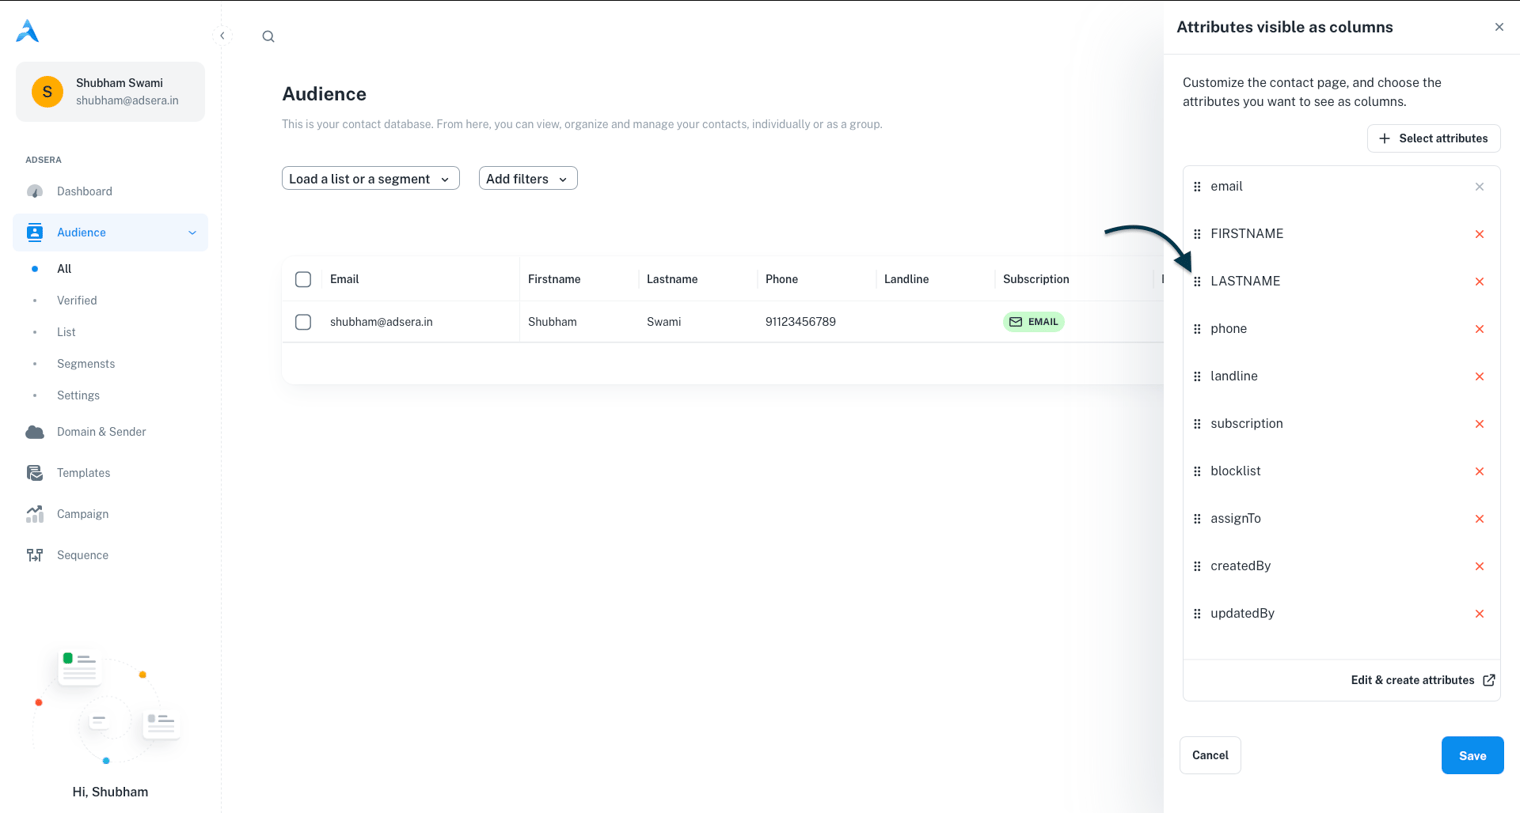
Click the **"Customize column"** button to open a side panel. From here, you can:
* **Show/Hide Columns:** Uncheck any attribute you don't need to see to reduce clutter.
* **Reorder Columns:** Simply drag and drop the column names in the panel to reorder them in the table. Your custom view is saved automatically for your next visit.
Manage thousands of contacts at once.
1. **Select contacts** using the checkboxes on the left. Use the master checkbox in the header to select all visible contacts.
2. The **Bulk Actions** menu will appear at the top.
3. Choose an action: **Assign Tag**, **Add to List**, **Export** to CSV, **Edit** an attribute for all, or **Delete**.
The **Delete** action is permanent and cannot be undone. Use it with caution.